Tag Archives: FreeBSD

Linux is dead, long-live Docker monoculture

Full Discloser: While reading this blog post, please put yourself in my shoes. You’ve been looking around for a simple monitoring solution, you found some. None of the some are working because you use an Operating System that is used by Apple, WhatsApp, Netflix and many more, but developers think that everyone, everywhere, runs either macOS or Linux. And they all use Docker.

A while back Rubenerd wrote that he’s not sure that UNIX won and how Linux created a monoculture of assuming everything is supposed to run on Linux.

For me, this was not much of a problem, I can run Linux binaries on FreeBSD, I even watch Netflix using Linuxulator.

But now things are on another level, WAY another level.

I have a simple monitoring setup using cron, Grafana, InfluxDB and ping. It basically pings my servers and sends me a telegram message if they are down.

I set that up years ago, but now I have more public facing infrastructure that other people use as well, such as an Armenian Lobsters instance, Jabber.am, a WriteFreely instance and more.

As a self-respecting Ops, I wanted to make a simple dashboard for my users to see the uptime status of these services as well. First, they won’t bug me asking if something is not working; they will SEE, that, SSL/TLS certificate is expired, or the network is an issue, or that the server is down.

<rant>

So I started hunting on the internet for some software that do just that.

The first one that came to my mind was Gatus. I’ve used Gatus before for one of my clients, I like it a lot. It’s simple, it does what it’s supposed to do.

As a sane person, I fetched the code from GitHub using fetch, extracted the tarball and ran make. Nothing happens. Let’s see the Makefile, shall we?

Docker executed in Make

Oh boy, if only, only, I had Docker, all my problems would be solved. First of all, let’s talk about the fact that this Makefile is used as a… script. There’s no dependencies in the targets!

Okay, let’s read that Dockerfile. Executing the scripts inside it should help out, aye?

# Build the go application into a binary
FROM golang:alpine as builder
RUN apk --update add ca-certificates
WORKDIR /app
COPY . ./
RUN CGO_ENABLED=0 GOOS=linux go build -mod vendor -a -installsuffix cgo -o gatus .

# Run Tests inside docker image if you don't have a configured go environment
#RUN apk update && apk add --virtual build-dependencies build-base gcc
#RUN go test ./... -mod vendor

# Run the binary on an empty container
FROM scratch
COPY --from=builder /app/gatus .
COPY --from=builder /app/config.yaml ./config/config.yaml
COPY --from=builder /app/web/static ./web/static
COPY --from=builder /etc/ssl/certs/ca-certificates.crt /etc/ssl/certs/ca-certificates.crt
ENV PORT=8080
EXPOSE ${PORT}

There are multiple things wrong in me this.

First, please stop putting your binaries in /app, please, pretty-please? We have /usr/local/bin/ for that.

Second, I thought that running go build without GOOS=linux would solve all of my problems. I was wrong, very wrong.

root@mon:~/gatus/gatus-2.8.1 # env CGO_ENABLED=0 go build -mod vendor -a -installsuffix cgo -o gatus .
package github.com/TwinProduction/gatus
        imports github.com/TwinProduction/gatus/config
        imports github.com/TwinProduction/gatus/storage
        imports github.com/TwinProduction/gatus/storage/store
        imports github.com/TwinProduction/gatus/storage/store/sqlite
        imports modernc.org/sqlite
        imports modernc.org/libc
        imports modernc.org/libc/errno: build constraints exclude all Go files in /root/gatus/gatus-2.8.1/vendor/modernc.org/libc/errno

Okay, check this out, the package is called modernc.org/sqlite and it says:

Package sqlite is a CGo-free port of SQLite.

SQLite is an in-process implementation of a self-contained, serverless, zero-configuration, transactional SQL database engine.

Of course it is. Looks like I have to port all of this to FreeBSD. Which, don’t get me wrong, I’m okay with doing that, but I thought that we have POSIX for a reason. notsomuch.

Okay, I’m an open-source guy, I’ll spend some time this weekend to port this to FreeBSD. Let’s look for another solution!

Here’s another one, it’s called statping, also written in Go, the readme is so promising.

No Requirements

Statping is built in Go Language so all you need is the precompile binary based on your operating system. You won’t need to install anything extra once you have the Statping binary installed. You can even run Statping on a Raspberry Pi.

Sounds good! Let’s try it out.

Again, I fetch the tarball, I extract and I bake make.

apt executed in Make

Of course it requires apt! Because not only we all run Linux, be we all run a specific distribution of Linux with a specific package manager.

While tweeting with anger, Daniel pointed out that I should tell them kindly and it’ll work out. I’m sure it will. Let’s hope I can make it work first. I don’t like just opening issues. I’d rather send a patch directly.

</rant>

Overall, now I understand why most *BSD folks use, what’s the word here? ah, yes, old-school software on their systems, like Nagios and the rest.

The developers of the New World Order will assume, always, you are running Linux, as Ubuntu, and you always have Docker.

Hopefully this weekend I will be able to port these software to FreeBSD, otherwise I will just use the Linux layer.

Like Rubenerd said, I am thankful that the mainstream-ness of Linux helped other Unix systems as well, but monocultures are destroying what people have spent years to improve.

Hopefully, next week, I will write a blog post on how to fix these issues and how I got all of those up and running.

That’s all folks…

Reply via email.

Two Colons Equals Modules

Days ago I tweeted a shell function which is part of jailio’s code base. Jailio is a project I’ve been working on for the last 6 months. As the name implies, it’s a container management software for FreeBSD Jails.

It has two unique things compared to other Jail management software. First of all, it has no dependencies, it’s written purely in Shell. You can say the same about BastilleBSD, however, Jailio’s second unique thing is that it uses base tools only and requires the base system only. For example, you need to have bastille_enable in BastilleBSD, it also uses its own config files, etc. In Jailio, you need to have jail_enable, because technically Jailio automates jail.conf files. It also uses my patch to automate the jail.confs in /etc/jail.conf.d.

Anyway, back to our topic about Colons and Modules.

I like modules, I got introduced to them when I started programming in school. In Syria, we learn programming at 7th grade but in our school we started a year early, so 6th grade. We always start with block diagrams and then Turbo Pascal!

Yes, 16-bit Turbo Pascal was my first programming language and it had the concept of modules which we called Units.

And then you have languages like C or Shell which don’t have modules. If you use modules you KNOW that it’s hard not to use modules after that.

While reading the source code of vm-bhyve I learned that you can use two colons (::) as part of the function name, which can give you an amazing new superpower to take over the world write cleaner code.

For me this was a life-changer. I write a LOT of Shell code. I ship them to production too. No, you don’t need to write everything in a fancy new language and run it on kubernetes, you can always use simple languages like Shell and run them in a FreeBSD Jail. Or in my case, write in Shell to automate FreeBSD Jails.

Here’s an example code with “modules” in Shell. Note, this works in FreeBSD’s shell, I have not tested other Shells yet.

main.sh

#!/bin/sh

. ./mod1.sh

mod1::func1

mod1.sh

#!/bin/sh

mod1::func1(){
  printf "Here I am, rock you like a hurricane\n"
}
antranigv@pingvinashen:~ % ./main.sh 
Here I am, Rock you like a hurricane

As you can see it all relies on the concept that the function name itself has two colons in its name.

Here’s the code from jailio that I tweeted.

jail::get_next_id(){
  expr $(
    ( grep -s '$id' /etc/jail.conf.d/* || echo '$id = "0";' ) |
    awk -F '[="]' '{print $3}' |
    sort -h |
    tail -1
  ) + 1
}

After tweeting the code above Annatar replied that this should NOT work elsewhere and that’s how I got introduced to The Heirloom Project which provides traditional implementations of the original Unix tools from the original Unix source code.

Hopefully, I will see more people using “modules” in Shell scripts. Hopefully this trick works in other Shell implementations like Bash and zsh.

That’s all folks.

Reply via email.

The OS App vs The Browser OS

I like listening to online radios like anonradio and DeepHouseRadio, instead of me trying to organize my local library or listening the same music over and over again on Deezer, I get lazy and just use their HTTP link.

Like a sane person, I would use a media player to “open” these HTTP radio links. On my FreeBSD machine, all I need to do is mplayer http://the.domain/path/to/content, but on macOS it would not be that simple.

The default media player on macOS is QuickTime. Here is where my problems start. I open QuickTime Player, I set the location to the HTTP link and it all works fine. Until it doesn’t. A small network lag and it stops playing completely.

I am usually connected to the internet via a cable in my office or the house, but when I go wireless, there’s a blind spot in one of the rooms. My FreeBSD laptop with mplayer handles it all fine, but QuickTime? Not so much.

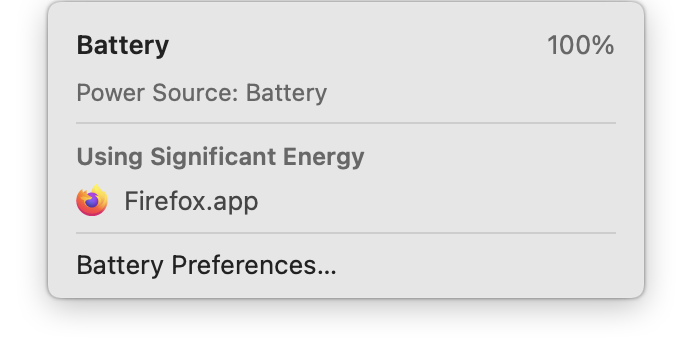
So I decided to use the “other” “Operating System” in macOS, also known as a browser, in this case Firefox. I open the link and it all works fine. Even if there’s a network lag, Firefox would handle it fine.

It’s sad funny how browsers are handling things better than native desktop programs these days.

While writing this blog-post I realized that macOS has another media player known as Music.app, so will try with that as well, let’s see how it will handle it.

That’s all folks.

Reply via email.

VNET Jail HowTo Part 2: Networking

As always, Dan has been tweeting about VNET Jail issues, which means it’s time for another VNET Jail post.

This post assumes that you’ve read the original post on VNET Jail HowTo.

In Part two we will discuss Networking.

We will use PF as a firewall to do things like NAT.

If you need more help please check the FreeBSD Handbook: Chapter – Firewalls or send me an email/tweet.

At this point (from the last post) we were able to ping from the Jail to the Host.

root@www:/ # ping -c 1 10.0.0.1
PING 10.0.0.1 (10.0.0.1): 56 data bytes
64 bytes from 10.0.0.1: icmp_seq=0 ttl=64 time=0.087 ms

--- 10.0.0.1 ping statistics ---
1 packets transmitted, 1 packets received, 0.0% packet loss
round-trip min/avg/max/stddev = 0.087/0.087/0.087/0.000 ms

Now we will setup PF on the host by adding the following to /etc/pf.conf

ext_if="em0"
jailnet="10.0.0.0/24"

nat pass on $ext_if inet from $jailnet to any -> ($ext_if)

set   skip on { lo0, bridge0 }
pass  inet proto icmp
pass  out all keep state

We also need to enable IP Forwarding in the kernel

Add the following in /etc/sysctl.conf

net.inet.ip.forwarding=1

And now execute

sysctl -f /etc/sysctl.conf
service pf restart

That should be it, now your Jail should be able to ping the outside world

root@zvartnots:~ # jexec -l www
You have mail.
root@www:~ # ping -c 1 9.9.9.9
PING 9.9.9.9 (9.9.9.9): 56 data bytes
64 bytes from 9.9.9.9: icmp_seq=0 ttl=61 time=2.566 ms

--- 9.9.9.9 ping statistics ---
1 packets transmitted, 1 packets received, 0.0% packet loss
round-trip min/avg/max/stddev = 2.566/2.566/2.566/0.000 ms
root@www:~ # 

If you setup a resolver, you should also be able to ping domain names as well.

root@www:~ # echo 'nameserver 9.9.9.9' > /etc/resolv.conf 
root@www:~ # ping -c 1 freebsd.org
PING freebsd.org (96.47.72.84): 56 data bytes
64 bytes from 96.47.72.84: icmp_seq=0 ttl=53 time=133.851 ms

--- freebsd.org ping statistics ---
1 packets transmitted, 1 packets received, 0.0% packet loss
round-trip min/avg/max/stddev = 133.851/133.851/133.851/0.000 ms

Now, for a more complicated setup that assumes no firewalls and multiple IP addresses, where each Jail has its own IP address. I have a similar setup at home where my ZNC server Jail has its own IP address by connecting the physical NIC to the same bridge as the ZNC Jail.

In my rc.conf on the host

ifconfig_em0="inet 192.168.0.34 netmask 255.255.255.0"
defaultrouter="192.168.0.1"

cloned_interfaces="bridge0"
ifconfig_bridge0="addm em0"

Here’s an example with jail.conf

znc {
	$id		= "52";
	$addr		= "192.168.0.252";
	$mask		= "255.255.255.0";
	$gw		= "192.168.0.1";
	vnet;
	vnet.interface	= "epair${id}b";

	exec.prestart	= "ifconfig epair${id} create up";
	exec.prestart	+= "ifconfig epair${id}a up descr vnet-${name}";
	exec.prestart	+= "ifconfig bridge0 addm epair${id}a up";

	exec.start	= "/sbin/ifconfig lo0 127.0.0.1 up";
	exec.start	+= "/sbin/ifconfig epair${id}b ${addr} netmask ${mask} up";
	exec.start	+= "/sbin/route add default ${gw}";
	exec.start	+= "/bin/sh /etc/rc";

	exec.poststop   = "ifconfig bridge0 deletem epair${id}a";
	exec.poststop  += "ifconfig epair${id}a destroy";

	host.hostname = "${name}.bsd.am";
	path = "/usr/local/jails/${name}";
 	exec.consolelog = "/var/log/jail-${name}.log";
	persist;
}

And that’s pretty much it!

That’s all folks.

Reply via email.

macOS to FreeBSD migration a.k.a why I left macOS

I think the title tells a lot about the story I’m going to tell you.

This is not a technical documentation for how I migrated from macOS to FreeBSD. This is a high-level for why I migrated from macOS to FreeBSD.

Not so long ago, I was using macOS as my daily driver. The main reason why I got a macbook was the underlying BSD Unix and the nice graphics it provides. Also, I have an iPhone. But they were also the same reasons for why I left macOS.

I did not want to write this post right after the migration, I wanted to take my time, use FreeBSD daily, see if I will ever miss macOS.

Here’s a tweet of mine from 8 months ago

Let’s look at it this way. macOS is becoming less Unix-y every year, date(1) is outdated, there are 100+ Unix processes running by the time the system is booted, most of them are useless for the general user, it has no native package manager (at least MacPorts/homebrew/pkgsrc is out there) and for a power user, there is no proper documentation. Have you ever checked the FreeBSD handbook? Everything is right there!

Okay, the nice graphics part. Have you seen the latest and greatest Big Sur? It feels like eye-candy, it’s not made for power users at all, everything seems to be a distraction now, even the icons. I’m no UI guru, but bringing iOS to the desktop is not for everyone.

So I decided to move to FreeBSD. This is where many people will tell me “Okay but not everything works outside the box”, true! but which OS works outside the box these days anyway? Windows is still a nightmare, setting up macOS took me 3 days the last time, Linux takes way more if you’re building it from scratch. Setting up FreeBSD took me 3 days, however this meant that I will NOT need to change it again for a very, very, VERY long time.

Every time Apple pushed an updated, my pf.conf and automount configs got broken on macOS. They either got deleted or they moved somewhere. Well, the last 2 times it just got deleted.

On FreeBSD, I upgraded from 12.1-RELEASE to 12.2-RELEASE and nothing broke, and in case there were any changes, FreeBSD just asked me what to do about them.

Let’s come back for a second. Unix is outdated and Apple does not care about it, fancy graphics are too fancy now. Doing forensics is almost impossible. And the hardware is, well, not the best out there (have you ever disassembled a MacBook Pro? it’s takes 2 hours to change a battery while I can reassemble my Dell Latitudes and ThinkPads in 30 minutes).

So there was no reason to stay here anymore. I had to migrate. The question is: where?

Linux has systemd, not my favorite thing out there, Windows is privacy nightmare. That left me with 2 major options: Linuxes without systemd (Gentoo, in my case) or BSDs.

Since I run FreeBSD servers anyway, I just migrated to FreeBSD.

Here’s a short review about running FreeBSD on ThinkPad T480s.

  • WiFi: works. not the fastest, but fast enough.
  • Graphics: works.
  • Touchpad: works with multiple fingers AND very configurable via sysctl.
  • BT does discovery and pairs, I still have to try it with non-Apple headphones.
  • COVID-19 era: Zoom, Google Hangouts, Jitsi and all other WebRTC-based video conferencing software works via web as well.
  • Thanks to Linuxulator, I can watch Netflix as well: here’s a screenshot.

Most importantly, it’s Free and Open Source.

It’s been 1 month and 1 day since I last touched my MacBook Pro, so, what do I miss?

  • Better BT support
  • Faster WiFi

That’s it, that’s all missing on a FreeBSD laptop these days. WiFi can do 48Mbps according to ifconfig but I usually get 10-20Mbps. BT pairs with my Apple AirPods but I wish it worked till the end.

Having a nice workstation/laptop is not an easy thing, using macOS means living by Apple rules, Windows is the same for Microsoft. The BSDs gave me the power to be as free as possible 🙂

During the next weeks I’ll try to blog about the actual setup.

P.S. dear Apple employee, in case you’re reading this, please tell your management to update their BSD Unix layer. Some of us still care, some of us are not just Docker people, some of us are not just “modern” web developers. Thanks in advance.

That’s all folks! 🙂

Reply via email.

Signal-cli with scli on FreeBSD

So couple of days ago I migrated from macOS on Macbook Pro to FreeBSD on ThinkPad T480s.

Unfortunately, since we are in war, I do not have the time to blog about the migration, although I’m taking notes every day about every change that I do so I can blog later on 🙂

However, one of the biggest concerns for me was running Signal on FreeBSD, as I understnad, Signal people are not interested in supporting the *BSDs.

As any sane person, I started searching the internet for possible solutions and turns out all I need is two pieces of software

The installation is as easy as running

pkg install signal-cli scli

Now for the simple part.

First, you need to link your phone by running

signal-cli link -n "FreeBSD"

It will give an output that says tsdevice:/?uuid=...&pub_key=....

Copy that output, and then in another terminal run

qrencode 'tsdevice:/?uuid=...&pub_key=...' -t ANSI256

You will be represented by a QR Code in the console (cool, aye?).

Using the phone app, link the device by scanning the QR Code.

To receive list of your contacts run

signal-cli -u +myphonenumber receive

Now try to run the TUI interface by running

scli

Side-note: In case you are not able to send or receive messages, you might need to do some DBUS magic.

First, find if you have DBUS running

antranigv@zvartnots:~ $ ps -x -o comm,pid | grep dbus
dbus-launch         53571
dbus-daemon         54064
dbus-daemon         54963

Then, you will need to find the DBUS_SESSION_BUS_ADDRESS environment variable, this is usually set in the DBUS child process, in our case, it’s 54963, so we can use procstat as root

root@zvartnots:~ # procstat -e 54963
  PID COMM             ENVIRONMENT                                          
54963 dbus-daemon      SHELL=/usr/local/bin/bash DBUS_STARTER_ADDRESS=unix:path=/tmp/dbus-TaY0zoKZIb,guid=4f518f874f97170e788a94fb5fa14a3c DISPLAY=:0.0 WMAKER_BIN_NAME=wmaker PATH=/sbin:/bin:/usr/sbin:/usr/bin:/usr/local/sbin:/usr/local/bin:/home/antranigv/bin WINDOWPATH=9 MAIL=/var/mail/antranigv GTK_THEME=Adwaita:dark DBUS_SESSION_BUS_ADDRESS=unix:path=/tmp/dbus-TaY0zoKZIb,guid=4f518f874f97170e788a94fb5fa14a3c USER=antranigv DBUS_STARTER_BUS_TYPE=session MM_CHARSET=UTF-8 WRASTER_COLOR_RESOLUTION0=4 PWD=/usr/home/antranigv BLOCKSIZE=K LANG=en_US.UTF-8 LOGNAME=antranigv HOME=/home/antranigv

Okay! we have our variable!

Now, we need to set the ENV and we are done, if you use (t)csh then execute

setenv DBUS_SESSION_BUS_ADDRESS unix:path=/tmp/dbus-TaY0zoKZIb,guid=4f518f874f97170e788a94fb5fa14a3c

If you are using bash, run the following

export DBUS_SESSION_BUS_ADDRESS=unix:path=/tmp/dbus-TaY0zoKZIb,guid=4f518f874f97170e788a94fb5fa14a3c

Now, you can run scli again and it will work fine 🙂

Happy Chatting!@#$%

That’s all folks! 🙂

Reply via email.

VNET Jail HowTo

So Dan has been tweeting that there’s no good example to get started with VNET Jails with jail.conf, I thought it’s time to write one.

In this example I’ve used FreeBSD 12.1-RELEASE

root@jail-host:~ # freebsd-version
12.1-RELEASE
root@jail-host:~ # uname -a
FreeBSD jail-host 12.1-RELEASE FreeBSD 12.1-RELEASE r354233 GENERIC  amd64
root@jail-host:~ #

First thing first, let’s setup a bridge on our host

root@jail-host:~ # sysrc cloned_interfaces="bridge0"
cloned_interfaces:  -> bridge0
root@jail-host:~ # sysrc ifconfig_bridge0="inet 10.0.0.1 netmask 0xffffff00 descr jails-bridge"
ifconfig_bridge0:  -> inet 10.0.0.1 netmask 0xffffff00 descr jails-bridge

Start the bridge0 interface without restarting the other interfaces

root@jail-host:~ # service netif start bridge0

Good! let’s setup a ZFS dataset for Jails 😉

root@jail-host:~ # zfs create -o mountpoint=/usr/local/jails zroot/jails

Good! now let’s fetch the base.txz file. I will be using my closest mirror, you should use yours.

root@jail-host:~ # mkdir /usr/local/jails/.dist-files
root@jail-host:~ # fetch -o /usr/local/jails/.dist-files/FreeBSD-12.1-RELEASE-base.txz http://mirror.yandex.ru/freebsd/releases/amd64/12.1-RELEASE/base.txz

Perfect!

Now, we will extract the base into the jail.

root@jail-host:~ # zfs create zroot/jails/www
root@jail-host:~ # tar xf /usr/local/jails/.dist-files/FreeBSD-12.1-RELEASE-base.txz -C /usr/local/jails/www/

Nicely done! Now let’s setup our /etc/jail.conf 🙂

Here’s my configuration.

# vim: set syntax=sh:
exec.stop  = "/bin/sh /etc/rc.shutdown";
exec.clean;
allow.raw_sockets;
allow.mount.tmpfs;
mount.devfs;


www {
    $id     = "10";
    $ipaddr = "10.0.0.${id}";
    $mask   = "255.255.255.0";
    $gw     = "10.0.0.1";
    vnet;
    vnet.interface = "epair${id}b";

    exec.prestart   = "ifconfig epair${id} create up";
    exec.prestart  += "ifconfig epair${id}a up descr vnet-${name}";
    exec.prestart  += "ifconfig bridge0 addm epair${id}a up";

    exec.start      = "/sbin/ifconfig lo0 127.0.0.1 up";
    exec.start     += "/sbin/ifconfig epair${id}b ${ipaddr} netmask ${mask} up";
    exec.start     += "/sbin/route add default ${gw}";
    exec.start     += "/bin/sh /etc/rc";

    exec.prestop    = "ifconfig epair${id}b -vnet ${name}";

    exec.poststop   = "ifconfig bridge0 deletem epair${id}a";
    exec.poststop  += "ifconfig epair${id}a destroy";

    host.hostname = "${name}.jail-host";
    path = "/usr/local/jails/${name}";
    exec.consolelog = "/var/log/jail-${name}.log";
    persist;
}

Now let’s start our Jail!

root@jail-host:~ # service jail enable
jail enabled in /etc/rc.conf
root@jail-host:~ # service jail start www
Starting jails: www.
root@jail-host:~ # jls
   JID  IP Address      Hostname                      Path
     1                  www.jail-host                 /usr/local/jails/www

Let’s check the networking 🙂

root@jail-host:~ # ping -c 1 10.0.0.10
PING 10.0.0.10 (10.0.0.10): 56 data bytes
64 bytes from 10.0.0.10: icmp_seq=0 ttl=64 time=0.164 ms

--- 10.0.0.10 ping statistics ---
1 packets transmitted, 1 packets received, 0.0% packet loss
round-trip min/avg/max/stddev = 0.164/0.164/0.164/0.000 ms

We can do the same from the jail.

root@jail-host:~ # jexec www
root@www:/ # ping -c 1 10.0.0.1
PING 10.0.0.1 (10.0.0.1): 56 data bytes
64 bytes from 10.0.0.1: icmp_seq=0 ttl=64 time=0.087 ms

--- 10.0.0.1 ping statistics ---
1 packets transmitted, 1 packets received, 0.0% packet loss
round-trip min/avg/max/stddev = 0.087/0.087/0.087/0.000 ms

We can also stop all the jails.

root@jail-host:~ # service jail stop
Stopping jails: www.

Okay! Couple of notes 🙂

You can have jail.conf at /etc/jail.conf or /etc/something.jail.conf. The problem with the latter is that if you have jail_enable="YES" in rc.conf without defining jail_list then it will run only the jails in /etc/jail.conf

There are more ways to configure VNET Jails, either with jib or jng, an example is here.

Ideally, it would be nice to have /etc/jail.d/myjail.conf, and I wrote a patch for that (D24570), if you are a FreeBSD developer, please have a look 🙂

Reply via email.

FreeBSD ZFS on Root Migration

My home server (running this blog) got old, it has only 2G of RAM and a very old hard drive.

I usually like to use laptops as home server, they get the job done! I know I can’t have fancy things like RAID1, but I usually keep my backups on a separate disk/machine anyway.

So, I got my Dell Latitude E5470 next to my 11 years old Dell Inspiron to start the migration process.

Here’s a simple how-to guide for migrating a FreeBSD system from one machine to another.


Snapshotting The Pool

Okay, on the old host let snapshot the pool.

zfs snap -r zroot@migrate

Let’s save that snapshot in a file.

zfs send -R zroot@migrate | gzip > /usr/local/zroot.zfs.gz

This might take a while, grab some coffee 🙂

Now let’s save the ZFS Boot Environment (bootfs) property

# zpool get bootfs zroot
NAME   PROPERTY  VALUE               SOURCE
zroot  bootfs    zroot/ROOT/default  local

Perfect! now let’s go to the new host! 🙂

Installing FreeBSD

Well, this is simple 🙂 first, install FreeBSD on the new machine. DON’T forget to use ZFS! 🙂

The reason why we are doing this so the FreeBSD installer will handle all the boot loader installation process. If you know how to do this manually, then be my guest (and blog about it).

“Reset” ZFS

Okay, now let’s “reset” that pool

zpool destroy zroot
zpool create -R /mnt zroot /dev/ada0p3 # please check the partition index thought
zpool export zroot # so we can import again with -N
zpool import -N -R /mnt zroot

Restore Old Snapshot

Here we go.

ssh antranigv@pingvinashen "gzcat /usr/local/zroot.zfs.gz" | zfs receive -v -u -F zroot

Aaand we wait again.

So, check you restored all the datasets with zfs list -r zroot

Set the bootfs property.

zpool set bootfs=zroot/ROOT/default zroot

Fingers Crossed and reboot

well, now it’s the time.

shutdown -r now

Done

Hope this helps 🙂

Reply via email.

Setting route interface in FreeBSD

I usually blog for myself, so I don’t forget stuff when I need them 😛

I’m usually connected via WiFi to a network, however, FreeBSD’s WiFi drivers are not very… good. I mean they do work and do essential stuff, but it’s slow 🙂 anyways.

That’s why I’m always connected to the network using a wire as well.

The problem that I always encounter and want to solve is to change the default route’s interface after wiring up 🙂

Here’s how you can do that.

# netstat -4rn | grep default
default            10.10.200.254      UGS       wlan0
# route change default 10.10.200.254 -ifp em0
change net default: gateway 10.10.200.254 fib 0
# netstat -4rn | grep default
default            10.10.200.254      UGS         em0

and so on…

Reply via email.

FreeBSD USB Disk and ZVOL Encryption with GELI

Disk encryption is becoming more important in our day to day life, specially when you have access to some corporate servers or “top secret” files.

I love FreeBSD, it’s simple, rock-solid, easy to use, the handbook is amazing! It also has the option to encrypt the disks during installation. I use FreeBSD everywhere (and TrueOS on my laptop), but disk encryption takes a lot of power, so I chose instead of doing full disk encryption in my laptop, I’ll just have a small media like a USB drive or ZFS ZVOL and encrypt that.

Here’s how to do so 🙂

If you compiled your own kernel ensure it contains these options

options GEOM_ELI
device crypto

Now, make sure crypto and geom_eli is loaded and add these lines to /boot/loader.conf:

crypto_load=YES
geom_eli_load=YES

Let’s move on.

Now, we need the partition that we are going to encrypt it.
In case it’s a USB drive that you want to encrypt, here’s what to do. First, plug-in the USB drive into your computer. Now, let’s check it’s GEOM class name.

# geom disk list
Geom name: ada0
Providers:
1. Name: ada0
   Mediasize: 480103981056 (447G)
   Sectorsize: 512
   Mode: r1w1e2
   descr: SanDisk Ultra II 480GB
   lunid: 5001b444a4a40542
   ident: 162265428493
   rotationrate: 0
   fwsectors: 63
   fwheads: 16

Geom name: da0
Providers:
1. Name: da0
   Mediasize: 4004511744 (3.7G)
   Sectorsize: 512
   Mode: r0w0e0
   descr: SanDisk Cruzer Fit
   lunname: SanDisk Cruzer Fit      4C532000030211123165
   lunid: SanDisk Cruzer Fit      4C532000030211123165
   ident: 4C532000030211123165
   rotationrate: unknown
   fwsectors: 63
   fwheads: 255

Destroy and Create New Partitions

Okay, as we can see it’s da0. First, let’s destroy it and make a new partition on it! (Make sure you backup your data in case you have any important files).

# gpart destroy -F da0
da0 destroyed
# gpart create -s GPT da0
da0 created
# gpart add -t freebsd-ufs -i 1 da0
da0p1 added

In my case, I didn’t want to use a USB drive, I wanted to have an encrypted ZVOL, here’s how to do that as well.
First, create a ZVOL

# zfs create -V 1G zroot/private

Okay, so, in case of a USB drive, we have a partition waiting for us, in case of ZVOL, we have 1GB volume.

Let’s encrypt those!

Initiating Encryption

There are multiple ways to encrypt a disk, check geli(8) for detailed info. Here I’ll show you two options.

  • Encrypting with a master key that is protected with a passphrase.
  • Encrypting with a passphrase only.

For the first option first, generate a key!

# dd if=/dev/random of=/root/master.key bs=64 count=1

Now we initialize the provider which needs to be encrypted.

# geli init -s 4096 -K /root/master.key /dev/da0p1

or in case of ZVOL

# geli init -s 4096 -K /root/master.key /dev/zvol/zroot/private

You’ll be asked to enter your passphrase, twice.

For the second option, it’s exactly the same command without -K /root/master.key. So for the ZVOL it would be

# geli init -s 4096 /dev/zvol/zroot/private

Attaching Encrypted Disks

Now we can attach the provider with the generated key or without it, here’s an example.

# geli attach -k /root/master.key /dev/da0p1

You will be asked for your passphrase.
Or without the key, only the passphrase, here’s an example.

# geli attach /dev/zvol/zroot/private

This creates a new device with .eli extention:

# ls /dev/zvol/zroot/private
private.eli%    private%

Create New File System

First, let’s randomize whatever is on the device and then format it with UFS file system.

# dd if=/dev/random of=/dev/zvol/zroot/private.eli bs=1m
# newfs /dev/zvol/zroot/private.eli

Mount and Use

# mount /dev/zvol/zroot/private.eli /mnt/private
# echo 'some data' > /mnt/private/mytopsecretdata

Detaching Encrypted Volume

# umount /mnt/private
# geli detach /dev/zvol/zroot/private.eli

That’s all folks! 🙂

Reply via email.