Tag Archives: HowTo

The FreeBSD-native-ish home lab and network

For many years my setup was pretty simple: A FreeBSD home server running on my old laptop. It runs everything I need to be present on the internet, an email server, a web server (like the one you’ve accessed right now to see this blog post) and a public chat server (XMPP/Jabber) so I can be in touch with friends.

For my home network, I had a basic Access Point and a basic Router.

Lately, my setup has become more… intense. I have IPv6 thanks to Hurricane Electric, the network is passed to my home network (which we’ll talk about in a bit), a home network with multiple VLANs, since friends who come home also need WiFi.

I decided to blog about the details, hoping it would help someone in the future.

I’ll start with the simplest one.

The Home Server

I’ve been running home servers for a long time. I believe that every person/family needs a home server. Forget about buying your kids iPads and Smartphones. Their first devices should be a real computer (sorry Apple, iOS devices are still just a toy) like a desktop/laptop and a home server. The home server doesn’t need to be on the public internet, but mine is, for variety of reasons. This blog being one of them.

I get a static IP address from my ISP, Ucom. After the management change that happened couple of years ago, Ucom has become a very typical ISP (think shitty), but they are the only ones that provide a static IP address, instead of setting it on your router, where you have to do port forwarding.

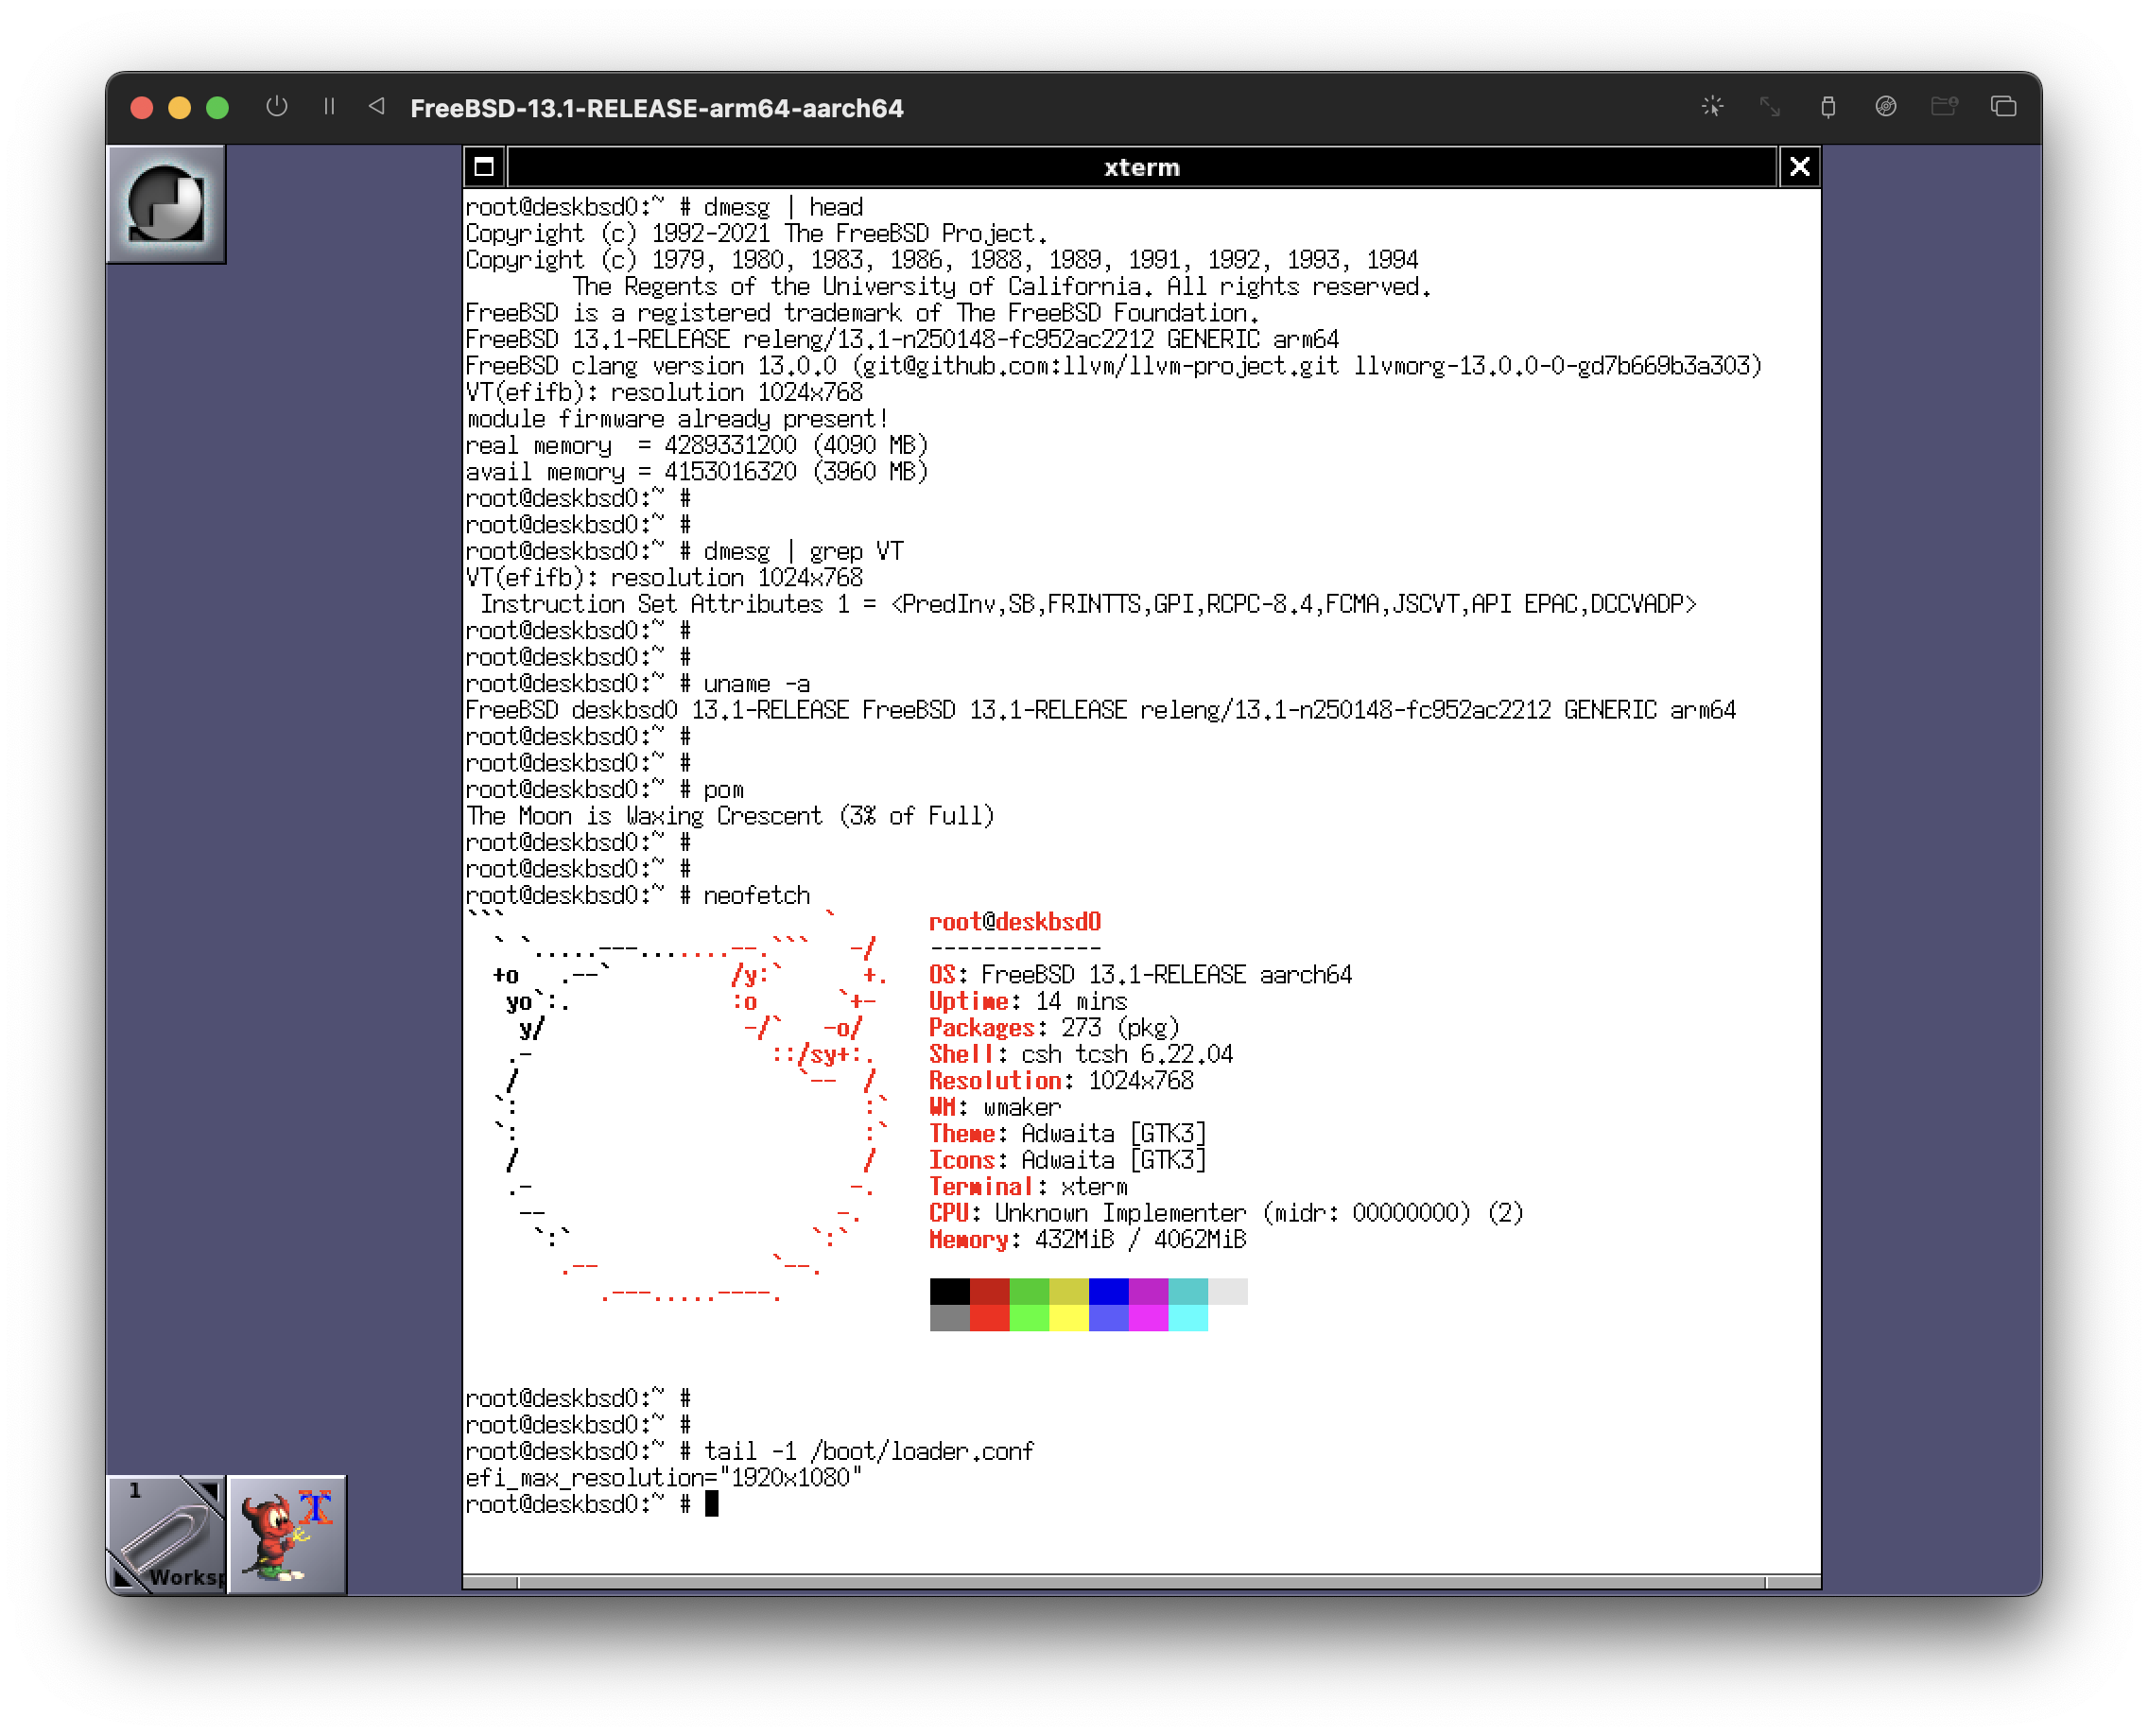
My home server, hostnamed pingvinashen (meaning the town of the penguins, named after the Armenian cartoon) run FreeBSD. Historically this machine has run Debian, Funtoo, Gentoo and finally FreeBSD.

Hardware wise, here’s what it is:

root@pingvinashen:~ # dmidecode -s system-product-name
Latitude E5470
root@pingvinashen:~ # sysctl hw.model
hw.model: Intel(R) Core(TM) i7-6820HQ CPU @ 2.70GHz
root@pingvinashen:~ # sysctl hw.physmem
hw.physmem: 17016950784
root@pingvinashen:~ # zpool list
NAME    SIZE  ALLOC   FREE  CKPOINT  EXPANDSZ   FRAG    CAP  DEDUP    HEALTH  ALTROOT
zroot   420G   178G   242G        -         -    64%    42%  1.00x    ONLINE  -

While most homelabbers use hardware virtualization, I think that resources are a tight thing, and should be managed properly. Any company that markets itself as “green/eco-friendly” and uses hardware virtualization should do calculations using a pen and paper and prove if going native would save power/resources or not. (sometimes it doesn’t, usually it does)

I use containers, the old-school ones, Jails to be more specific.

I manage jails using Jailer, my own tool, that tries to stay out of your way when working with Jails.

Here are my current jails:

root@pingvinashen:~ # jailer list
NAME        STATE    JID  HOSTNAME              IPv4               GW
antranig    Active   1    antranig.bsd.am       192.168.10.42/24   192.168.10.1
antranigv   Active   2    antranigv.bsd.am      192.168.10.52/24   192.168.10.1
git         Stopped
huginn0     Active   4    huginn0.bsd.am        192.168.10.34/24   192.168.10.1
ifconfig    Active   5    ifconfig.bsd.am       192.168.10.33/24   192.168.10.1
lucy        Active   6    lucy.vartanian.am     192.168.10.37/24   192.168.10.1
mysql       Active   7    mysql.antranigv.am    192.168.10.50/24   192.168.10.1
newsletter  Active   8    newsletter.bsd.am     192.168.10.65/24   192.168.10.1
oragir      Active   9    oragir.am             192.168.10.30/24   192.168.10.1
psql        Active   10   psql.pingvinashen.am  192.168.10.3/24    192.168.10.1
rss         Active   11   rss.bsd.am            192.168.10.5/24    192.168.10.1
sarian      Active   12   sarian.am             192.168.10.53/24   192.168.10.1
syuneci     Active   13   syuneci.am            192.168.10.60/24   192.168.10.1
znc         Active   14   znc.bsd.am            192.168.10.152/24  192.168.10.1

You already get a basic idea of how things are. Each of my blogs (Armenian and English) has its own Jail. Since I’m using WordPress, I need a database, so I have a MySQL jail (which ironically runs MariaDB) inside of it.

I also have a Git server, running gitea, which is down at the moment as I’m doing maintanence. The Git server (and many other services) requires PostgreSQL, hence the existence of  a PostgreSQL jail. I run huginn for automation (RSS to Telegram, RSS to XMPP). My sister has her own blog, using WordPress, so that’s a Jail of its own. Same goes about my fiancée.

Other Jails are Newsletter using Listmonk, Sarian (the Armenian instance of lobste.rs) and a personal ZNC server.

As an avid RSS advocate, I also have a RSS Jail, which runs Miniflux. Many of my friends use this service.

Oragir is an instance of WriteFreely, as I advocate public blogging and ActivityPub. Our community uses that too.

The web server that forwards all this traffic from the public to the Jails is nginx. All it does is proxy_pass as needed. It runs on the host.

Other services that run on the host are DNS (BIND9), an email service running OpenSMTPd (which will be moved to a Jail soon), the chat service running prosody (which will be moved to a Jail soon) and finally, WireGuard, because I love VPNs.

Finally, there’s a IPv6-over-IPv4 tunnel that I use to obtain IPv6 thanks to Hurricane Electric.

Yes, I have a firewall, I use pf(4).

For the techies in the room, here’s what my rc.conf looks like.

# cat /etc/rc.conf
# Defaults
clear_tmp_enable="YES"
syslogd_flags="-ss"
sendmail_enable="NONE"
#local_unbound_enable="YES"
sshd_enable="YES"
moused_enable="YES"
ntpd_enable="YES"
# Set dumpdev to "AUTO" to enable crash dumps, "NO" to disable
dumpdev="AUTO"
zfs_enable="YES"

hostname="pingvinashen.am"

# Networking
defaultrouter="37.157.221.1"
gateway_enable="YES"


ifconfig_em0="up"
vlans_em0="37 1000" # 1000 -> WAN; 37 -> Home Router

ifconfig_em0_1000="inet 37.157.221.130 netmask 255.255.255.0"
ifconfig_em0_37="inet 192.168.255.2 netmask 255.255.255.0"

static_routes="home"
route_home="-net 172.16.100.0/24 -gateway 192.168.255.1"


cloned_interfaces="bridge0 bridge6 bridge10"
ifconfig_bridge10="inet 192.168.10.1 netmask 255.255.255.0"


## IPv6
ipv6_gateway_enable="YES"

gif_interfaces="gif0"
gifconfig_gif0="37.157.221.130 216.66.84.46"
ifconfig_gif0="inet6 2001:470:1f14:ef::2 2001:470:1f14:ef::1 prefixlen 128"
ipv6_defaultrouter="2001:470:1f14:ef::1"

ifconfig_em0_37_ipv6="inet6 2001:470:7914:7065::2 prefixlen 64"
ipv6_static_routes="home guest"
ipv6_route_home="-net 2001:470:7914:6a76::/64 -gateway 2001:470:7914:7065::1"
ipv6_route_guest="-net 2001:470:7914:6969::/64 -gateway 2001:470:7914:7065::1"

ifconfig_bridge6_ipv6="inet6 2001:470:1f15:e4::1 prefixlen 64"

ifconfig_bridge6_aliases="inet6 2001:470:1f15:e4::25 prefixlen 64 \
inet6 2001:470:1f15:e4::80 prefixlen 64      \
inet6 2001:470:1f15:e4::5222 prefixlen 64    \
inet6 2001:470:1f15:e4:c0fe::53 prefixlen 64 \
"


# VPN
wireguard_enable="YES"
wireguard_interfaces="wg0"

# Firewall
pf_enable="YES"

# Jails
jail_enable="YES"
jailer_dir="zfs:zroot/jails"

# DNS
named_enable="YES"

# Mail
smtpd_enable="YES"
smtpd_config="/usr/local/etc/smtpd.conf"

# XMPP
prosody_enable="YES"
turnserver_enable="YES"

# Web
nginx_enable="YES"
tor_enable="YES"

The gif0 interface is a IPv6-over-IPv4 tunnel. I have static routes to my home network, so I don’t go to my server over the ISP every time. This also gives me the ability to get IPv6 in my home network that is routed via my home server.

As you have guessed from this config file, I do have VLANs setup. So let’s get into that.

The Home Network

First of all, here’s a very cheap diagram

I have the following VLANs setup on the switch.

VLAN ID Purpose
1 Switch Management
1000 pingvinashen (home server) WAN
1001 evn0 (home router) WAN
37 pingvinashen ↔ evn0
42 Internal Management
100 Home LAN
69 Home Guest

Here are the active ports

Port VLANs Purpose
24 untagged: 1 Switch management, connects to Port 2
22 untagged: 1000 pingvinashen WAN, from ISP
21 untagged: 1001 Home WAN, from ISP
20 tagged: 1000, 37 To pingvinashen, port em0
19 untagged: 1001 To home router, port igb1
18 tagged: 42, 100, 69, 99 To home router, port igb2
17 untagged: 37 To home router, port igb0
16 tagged: 42, 100, 69 To Lenovo T480s
15 untagged: 100 To Raspberri Pi 4
2 untagged: 99 From Port 24, for switch management
1 untagged: 42; tagged: 100, 69; PoE To UAP AC Pro

The home router, hostnamed evn0 (named after the IATA code of Yerevan’s Zvartnots International Airport) runs FreeBSD as well, the hardware is the following

root@evn0:~ # dmidecode -s system-product-name
APU2
root@evn0:~ # sysctl hw.model
hw.model: AMD GX-412TC SOC                               
root@evn0:~ # sysctl hw.physmem
hw.physmem: 4234399744
root@evn0:~ # zpool list
NAME    SIZE  ALLOC   FREE  CKPOINT  EXPANDSZ   FRAG    CAP  DEDUP    HEALTH  ALTROOT
zroot  12.5G  9.47G  3.03G        -         -    67%    75%  1.00x    ONLINE  -

The home router does… well, routing. It also does DHCP, DNS, SLAAC, and can act as a syslog server.

Here’s what the rc.conf looks like

clear_tmp_enable="YES"
sendmail_enable="NONE"
syslogd_flags="-a '172.16.100.0/24:*' -H"
zfs_enable="YES"
dumpdev="AUTO"

hostname="evn0.illuriasecurity.com"

pf_enable="YES"
gateway_enable="YES"
ipv6_gateway_enable="YES"

sshd_enable="YES"

# Get an IP address from the ISP's GPON
ifconfig_igb1="DHCP"

# Internal routes with pingvinashen
ifconfig_igb0="inet 192.168.255.1 netmask 255.255.255.0"
ifconfig_igb0_ipv6="inet6 2001:470:7914:7065::1 prefixlen 64"

static_routes="pingvinashen"
route_pingvinashen="-net 37.157.221.130/32 -gateway 192.168.255.2"

ipv6_defaultrouter="2001:470:7914:7065::2"

# Home Mgmt, Switch Mgmt, Home LAN, Home Guest
ifconfig_igb2="up"
vlans_igb2="42 99 100 69"
ifconfig_igb2_42="inet 172.31.42.1 netmask 255.255.255.0"
ifconfig_igb2_99="inet 172.16.99.1 netmask 255.255.255.0"

ifconfig_igb2_100="inet 172.16.100.1 netmask 255.255.255.0"
ifconfig_igb2_100_ipv6="inet6 2001:470:7914:6a76::1 prefixlen 64"

ifconfig_igb2_69="inet 192.168.69.1 netmask 255.255.255.0"
ifconfig_igb2_69_ipv6="inet6 2001:470:7914:6969::1 prefixlen 64"

# DNS and DHCP
named_enable="YES"
dhcpd_enable="YES"

named_flags=""

# NTP
ntpd_enable="YES"

# Router Advertisement and LLDP
rtadvd_enable="YES"
lldpd_enable="YES"
lldpd_flags=""

Here’s pf.conf, because security is important.

ext_if="igb1"
bsd_if="igb0"
int_if="igb2.100"
guest_if="igb2.69"
mgmt_if="igb2.42"
sw_if="igb2.99"

ill_net="172.16.0.0/16"

nat pass on $ext_if from $int_if:network to any -> ($ext_if)
nat pass on $ext_if from $mgmt_if:network to any -> ($ext_if)
nat pass on $ext_if from $guest_if:network to any -> ($ext_if)

set skip on { lo0 }

block in all

pass on $int_if   from $int_if:network   to any
pass on $mgmt_if  from $mgmt_if:network  to any
pass on $sw_if    from $sw_if:network    to any
pass on $guest_if from $guest_if:network to any

block quick on $guest_if from any to { $int_if:network, $mgmt_if:network, $ill_net, $sw_if:network }

pass in on illuria0 from $ill_net to { $ill_net, $mgmt_if:network }

pass inet  proto icmp
pass inet6 proto icmp6
pass out   all   keep state

I’m sure there are places to improve, but it gets the job done and keeps the guest network isolated.

Here’s rtadvd.conf, for my IPv6 folks

igb2.100:\
  :addr="2001:470:7914:6a76::":prefixlen#64:\
  :rdnss="2001:470:7914:6a76::1":\
  :dnssl="evn0.loc.illuriasecurity.com,loc.illuriasecurity.com":

igb2.69:\
  :addr="2001:470:7914:6969::":prefixlen#64:\
  :rdnss="2001:470:7914:6969::1":

For DNS, I’m running BIND, here’s the important parts

listen-on     { 127.0.0.1; 172.16.100.1; 172.16.99.1; 172.31.42.1; 192.168.69.1; };
listen-on-v6  { 2001:470:7914:6a76::1; 2001:470:7914:6969::1; };
allow-query   { 127.0.0.1; 172.16.100.0/24; 172.31.42.0/24; 192.168.69.0/24; 2001:470:7914:6a76::/64; 2001:470:7914:6969::/64;};

And for DHCP, here’s what it looks like

subnet 172.16.100.0 netmask 255.255.255.0 {
        range 172.16.100.100 172.16.100.150;
        option domain-name-servers 172.16.100.1;
        option subnet-mask 255.255.255.0;
        option routers 172.16.100.1;
        option domain-name "evn0.loc.illuriasecurity.com";
        option domain-search "loc.illuriasecurity.com evn0.loc.illuriasecurity.com";
}

host zvartnots {
    hardware ethernet d4:57:63:f1:5a:36;
    fixed-address 172.16.100.7;
}

host unifi0 {
    hardware ethernet 58:9c:fc:93:d1:0b;
    fixed-address 172.31.42.42;
}
[…] subnet 172.31.42.0 netmask 255.255.255.0 { range 172.31.42.100 172.31.42.150; option domain-name-servers 172.31.42.1; option subnet-mask 255.255.255.0; option routers 172.31.42.1; } subnet 192.168.69.0 netmask 255.255.255.0 { range 192.168.69.100 192.168.69.150; option domain-name-servers 192.168.69.1; option subnet-mask 255.255.255.0; option routers 192.168.69.1; }

So you’re wondering, what’s this unifi0? Well, that brings us to

T480s

This laptop has been gifted to me by [REDACTED] for my contributions to the Armenian government (which means when a server goes down and no one knows how to fix it, they called me and I showed up)

Here’s the hardware

root@t480s:~ # dmidecode -s system-version
ThinkPad T480s
root@t480s:~ # sysctl hw.model
hw.model: Intel(R) Core(TM) i5-8350U CPU @ 1.70GHz
root@t480s:~ # sysctl hw.physmem
hw.physmem: 25602347008
root@t480s:~ # zpool list
NAME    SIZE  ALLOC   FREE  CKPOINT  EXPANDSZ   FRAG    CAP  DEDUP    HEALTH  ALTROOT
zroot   224G   109G   115G        -         -    44%    48%  1.00x    ONLINE  -

The T480s has access to VLAN 100, 42, 69, but the host itself has access only to VLAN 100 (LAN), while the jails can exist on other VLANs.

So I have a Jail named unifi0 that runs the Unifi Management thingie.

Here’s what rc.conf of the host looks like

clear_tmp_enable="YES"
syslogd_flags="-ss"
sendmail_enable="NONE"
sshd_enable="YES"
ntpd_enable="YES"
# Set dumpdev to "AUTO" to enable crash dumps, "NO" to disable
dumpdev="AUTO"
zfs_enable="YES"

hostname="t480s.evn0.loc.illuriasecurity.com"

ifconfig_em0="up -rxcsum -txcsum"
vlans_em0="100 42 69"
ifconfig_em0_100="up"
ifconfig_em0_42="up"
ifconfig_em0_69="up"

cloned_interfaces="bridge0 bridge100 bridge42 bridge69"

create_args_bridge100="ether 8c:16:45:82:b4:10"
ifconfig_bridge100="addm em0.100 SYNCDHCP"
ifconfig_bridge100_ipv6="inet6 auto_linklocal"
rtsold_flags="-i -F -m bridge100"
rtsold_enable="YES"

create_args_bridge42=" ether 8c:16:45:82:b4:42"
create_args_bridge69=" ether 8c:16:45:82:b4:69"

ifconfig_bridge42="addm em0.42"
ifconfig_bridge69="addm em0.69"


jail_enable="YES"
jailer_dir="zfs:zroot/jailer"

ifconfig_bridge0="inet 10.1.0.1/24 up"
ngbuddy_enable="YES"
ngbuddy_private_if="nghost0"
dhcpd_enable="YES"

lldpd_enable="YES"

I used Jailer to create the unifi0 jail, here’s what the jail.conf looks like

# vim: set syntax=sh:
exec.clean;
allow.raw_sockets;
mount.devfs;

unifi0 {
  $id             = "6";
  devfs_ruleset   = 10;
  $bridge         = "bridge42";
  $domain         = "evn0.loc.illuriasecurity.com";
  vnet;
  vnet.interface = "epair${id}b";

  exec.prestart   = "ifconfig epair${id} create up";
  exec.prestart  += "ifconfig epair${id}a up descr vnet-${name}";
  exec.prestart  += "ifconfig ${bridge} addm epair${id}a up";

  exec.start      = "/sbin/ifconfig lo0 127.0.0.1 up";
  exec.start     += "/bin/sh /etc/rc";

  exec.stop       = "/bin/sh /etc/rc.shutdown jail";
  exec.poststop   = "ifconfig ${bridge} deletem epair${id}a";
  exec.poststop  += "ifconfig epair${id}a destroy";

  host.hostname   = "${name}.${domain}";
  path            = "/usr/local/jailer/unifi0";
  exec.consolelog = "/var/log/jail/${name}.log";
  persist;
  mount.fdescfs;
  mount.procfs;
}

Here are the important parts inside the jail

root@t480s:~ # cat /usr/local/jailer/unifi0/etc/rc.conf
ifconfig_epair6b="SYNCDHCP"
sendmail_enable="NONE"
syslogd_flags="-ss"
mongod_enable="YES"
unifi_enable="YES"
root@t480s:~ # cat /usr/local/jailer/unifi0/etc/start_if.epair6b 
ifconfig epair6b ether 58:9c:fc:93:d1:0b

Don’t you love it that you can see what’s inside the jail from the host? God I love FreeBSD!

Did I miss anything? I hope not.

Oh, for the homelabbers out there, the T480s is the one that runs things like Jellyfin if needed.

Finally, the tiny 

Raspberry Pi 4, Model B

I found this in a closed, so I decided to run it for TimeMachine.

I guess all you care about is rc.conf

hostname="tm0.evn0.loc.illuriasecurity.com"
ifconfig_DEFAULT="DHCP inet6 accept_rtadv"
sshd_enable="YES"
sendmail_enable="NONE"
sendmail_submit_enable="NO"
sendmail_outbound_enable="NO"
sendmail_msp_queue_enable="NO"
growfs_enable="YES"
powerd_enable="YES"
# Set dumpdev to "AUTO" to enable crash dumps, "NO" to disable
dumpdev="AUTO"
zfs_enable="YES"
rtsold_enable="YES"
samba_server_enable="YES"

And the Samba Configuration

[global]
# Network settings
workgroup = WORKGROUP
server string = Samba Server %v
netbios name = RPi4

# Logging
log file = /var/log/samba4/log.%m
max log size = 50
log level = 0

# Authentication
security = user
encrypt passwords = yes
passdb backend = tdbsam
map to guest = Bad User

min protocol = SMB2
max protocol = SMB3


# Apple Time Machine settings
vfs objects = catia fruit streams_xattr
fruit:metadata = stream
fruit:resource = stream
fruit:encoding = native
fruit:locking = none
fruit:time machine = yes

# File System support
ea support = yes
kernel oplocks = no
kernel share modes = no
posix locking = no
mangled names = no
smbd max xattr size = 2097152

# Performance tuning
read raw = yes
write raw = yes
getwd cache = yes
strict locking = no

# Miscellaneous
local master = no
preferred master = no
domain master = no
wins support = no

[tm]
comment = Time Machine RPi4
path = /usr/local/timemachine/%U
browseable = yes
read only = no
valid users = antranigv
vfs objects = catia fruit streams_xattr
fruit:time machine = yes
fruit:advertise_fullsync = true
fruit:time machine max size = 800G  # Adjust the size according to your needs
create mask = 0600
directory mask = 0700

That’s pretty much it.

Conclusion

I love running homebrew servers, home networks and home labs. I love that (almost) everything is FreeBSD. The switch itself runs Linux, and the Unifi Access Point also runs Linux, both of which I’m pretty happy with.

While most homelabbers used ESXi in the past, I’m happy to see that most people are moving to open source solutions like Proxmox and Xen, but I think that FreeBSD Jails and bhyve is much better. I still don’t have a need for bhyve at the moment, but I would use it if I needed hardware virtualization.

Most homelabbers would consider the lack of Web/GUI interfaces as a con, but I think that it’s a pro. If I need to “replicate” this network, all I need to do is to copy some text files and modify some IP addresses / Interface names.

I hope this was informative and that it would be useful for anyone in the future.

That’s all folks… 

Reply via email.

Installing FreeBSD with Root-on-ZFS on Vultr using iPXE

The title is pretty self explanatory, so let’s get to it, shall we?

I was configuring a server for a customer today, and one of the things I noticed is that FreeBSD was not available for bare-metal.

This got me a bit worried, because we use a lot of FreeBSD on Vultr… Well that’s a lie. We only use FreeBSD on Vultr.

I logged into our company account and noticed that our bare-metals does have FreeBSD as an icon for the image.

So I decided to check the docs and found this:

What operating system templates do you offer?

We offer many Linux and Windows options. We do not offer OpenBSD or FreeBSD images for Vultr Bare Metal. Use our iPXE boot feature if you need to install a custom operating system.

Well, that’s sad, but on the other hand, iPXE will be very useful. We can boot a memdisk such as mfsBSD and install FreeBSD from there.

To start, we need a VM that can host the mfsBSD img/ISO file. I have spun up a VM on Vultr running FreeBSD (altho it can run anything else, it wouldn’t matter), installed nginx on it, downloaded the file so we can boot from it. Here’s the copy-pasta

pkg install -y nginx
service nginx enable && service nginx start
fetch -o /usr/local/www/ \
https://mfsbsd.vx.sk/files/images/14/amd64/mfsbsd-se-14.0-RELEASE-amd64.img

This should be enough to get started. Oh, if you’re not on FreeBSD then the path might be different, like /var/www/nginx, or something alike. Check your nginx configuration for the details.

Now we need to write an iPXE script and add it into our Vultr iPXE scripts. Here’s what it looks like

#!ipxe

echo Starting MFSBSD
sanboot http://your.server.ip.address/mfsbsd-se-14.0-RELEASE-amd64.img
boot

Finally, we can create a bare-metal that uses our script for iPXE boot.

Don’t forget to choose the right location and plan.

After the machine is provisioned, you need to access the console and you will see the boot process.

The default root password is mfsroot.

To install FreeBSD, you can run bsdinstall. The rest will be familiar for you. Yes, you can use Root-on-ZFS. No, it can’t be in UEFI, you must use GPT (BIOS).

Good luck, and special thanks to Vultr for giving us the chance to use our favorite tools on the public cloud.

That’s all folks…

Reply via email.

Installing DFIR-IRIS on FreeBSD using Jails

This is a live blogging of the installation process of DFIR-IRIS on FreeBSD 14.0-RELEASE using Jails and Jailer.

The main requirements are:

  • Nginx
  • PostgreSQL
  • Python
  • Some random dependencies we saw in the Dockerfile

I assume you already have nginx up and running, we will just be setting up a vhost under the domain name dfir.cert.am. Don’t worry, this is INSIDE our infrastructure, you will not be able to connect to it 🙂

Initial Setup

First we create a jail named iris0, using Jailer:

jailer create iris0

Next we install the required software inside of the jail. Looks like everything is available in FreeBSD packages:

jailer console iris0
pkg install \ nginx \ python39 \ py39-pip \ gnupg \ 7-zip \ rsync \ postgresql12-client \ git-tiny \ libxslt \ rust \ acme.sh

Installing DFIR-IRIS

Since we’re using FreeBSD, we’ll be doing things the right way instead of the Docker way, so we will be running IRIS as a user, not as root.

pw user add iris -m

Next we setup some directories and checkout the repo

root@iris0:~ # pw user add iris -m
root@iris0:~ # su - iris iris@iris0:~ $ git clone --branch v2.4.7 https://github.com/dfir-iris/iris-web.git iris-web

Finally, we install some python dependencies using pip.

iris@iris0:~ $ cd iris-web/source
iris@iris0:~/iris-web/source $ pip install -r requirements.txt

Now we have to configure the .env file based on our needs, I will post my version of it, I hope it helps

# -- DATABASE
export POSTGRES_USER=postgres
export POSTGRES_PASSWORD=postgres
export POSTGRES_DB=iris_db
export POSTGRES_ADMIN_USER=iris
export POSTGRES_ADMIN_PASSWORD=longpassword

export POSTGRES_SERVER=localhost
export POSTGRES_PORT=5432

# -- IRIS
export DOCKERIZED=0
export IRIS_SECRET_KEY=verylongsecret
export IRIS_SECURITY_PASSWORD_SALT=verylongsalt
export IRIS_UPSTREAM_SERVER=app # these are for docker, you can ignore
export IRIS_UPSTREAM_PORT=8000

# -- WORKER
export CELERY_BROKER=amqp://localhost
# Set to your rabbitmq instance

# Change these as you need them.
# -- AUTH
#IRIS_AUTHENTICATION_TYPE=local
## optional
#IRIS_ADM_PASSWORD=MySuperAdminPassword!
#IRIS_ADM_API_KEY=B8BA5D730210B50F41C06941582D7965D57319D5685440587F98DFDC45A01594
#IRIS_ADM_EMAIL=admin@localhost
#IRIS_ADM_USERNAME=administrator
# requests the just-in-time creation of users with ldap authentification (see https://github.com/dfir-iris/iris-web/issues/203)
#IRIS_AUTHENTICATION_CREATE_USER_IF_NOT_EXIST=True
# the group to which newly created users are initially added, default value is Analysts
#IRIS_NEW_USERS_DEFAULT_GROUP=

# -- LISTENING PORT
#INTERFACE_HTTPS_PORT=443

Configuring HTTPS

We can use acme.sh to issue a TLS certificate from Lets Encrypt.

root@iris0:~ # acme.sh --set-default-ca --server letsencrypt
root@iris0:~ # acme.sh --issue -d dfir.cert.am --standalone
root@iris0:~ # acme.sh -i -d dfir.cert.am --fullchain-file /usr/local/etc/ssl/dfir.cert.am/fullchain.pem --key-file /usr/local/etc/ssl/dfir.cert.am/key.pem --reloadcmd 'service nginx reload'

Setup nginx

DFIR-IRIS provides a nginx configuration template at nginx.conf, we will be using that, with a little bit of modifications.

The final nginx.conf will look like this:

#user  nobody;
worker_processes  1;

# This default error log path is compiled-in to make sure configuration parsing
# errors are logged somewhere, especially during unattended boot when stderr
# isn't normally logged anywhere. This path will be touched on every nginx
# start regardless of error log location configured here. See
# https://trac.nginx.org/nginx/ticket/147 for more info. 
#
#error_log  /var/log/nginx/error.log;
#

#pid        logs/nginx.pid;


events {
    worker_connections  1024;
}


http {
    include       mime.types;
    default_type  application/octet-stream;

    # Things needed/recommended by DFIR-IRIS
    map $request_uri $csp_header {
        default "default-src 'self' https://analytics.dfir-iris.org; script-src 'self' 'unsafe-inline' https://analytics.dfir-iris.org; style-src 'self' 'unsafe-inline';";
    }

    server_tokens off;
    sendfile    on;
    tcp_nopush  on;
    tcp_nodelay on;

    types_hash_max_size             2048;
    types_hash_bucket_size          128;
    proxy_headers_hash_max_size     2048;
    proxy_headers_hash_bucket_size  128;
    proxy_buffering                 on;
    proxy_buffers                   8 16k;
    proxy_buffer_size               4k;

    client_header_buffer_size   2k;
    large_client_header_buffers 8 64k;
    client_body_buffer_size     64k;
    client_max_body_size        100M;

    reset_timedout_connection   on;
    keepalive_timeout           90s;
    client_body_timeout         90s;
    send_timeout                90s;
    client_header_timeout       90s;
    fastcgi_read_timeout        90s;
    # WORKING TIMEOUT FOR PROXY CONF
    proxy_read_timeout          90s;
    uwsgi_read_timeout          90s;

    gzip off;
    gzip_disable "MSIE [1-6]\.";

    # FORWARD CLIENT IDENTITY TO SERVER
    proxy_set_header    HOST                $http_host;
    proxy_set_header    X-Forwarded-Proto   $scheme;
    proxy_set_header    X-Real-IP           $remote_addr;
    proxy_set_header    X-Forwarded-For     $proxy_add_x_forwarded_for;

    # FULLY DISABLE SERVER CACHE
    add_header          Last-Modified $date_gmt;
    add_header          'Cache-Control' 'no-store, no-cache, must-revalidate, proxy-revalidate, max-age=0';
    if_modified_since   off;
    expires             off;
    etag                off;
    proxy_no_cache      1;
    proxy_cache_bypass  1;

    # SSL CONF, STRONG CIPHERS ONLY
    ssl_protocols               TLSv1.2 TLSv1.3;

    ssl_prefer_server_ciphers   on;
    ssl_certificate             /usr/local/etc/ssl/dfir.cert.am/fullchain.pem;
    ssl_certificate_key         /usr/local/etc/ssl/dfir.cert.am/key.pem;
    ssl_ecdh_curve              secp521r1:secp384r1:prime256v1;
    ssl_buffer_size             4k;

    # DISABLE SSL SESSION CACHE
    ssl_session_tickets         off;
    ssl_session_cache           none;
    server {
        listen          443 ssl
        server_name     dfir.cert.am;
        root            /www/data;
        index           index.html;
        error_page      500 502 503 504  /50x.html;

        add_header Content-Security-Policy $csp_header;
        
        # SECURITY HEADERS
        add_header X-XSS-Protection             "1; mode=block";
        add_header X-Frame-Options              DENY;
        add_header X-Content-Type-Options       nosniff;
        # max-age = 31536000s = 1 year
        add_header Strict-Transport-Security    "max-age=31536000: includeSubDomains" always;
        add_header Front-End-Https              on;

        location / {
            proxy_pass  http://localhost:8000;

            location ~ ^/(manage/templates/add|manage/cases/upload_files) {
                keepalive_timeout           10m;
                client_body_timeout         10m;
                send_timeout                10m;
                proxy_read_timeout          10m;
                client_max_body_size        0M;
                proxy_request_buffering off;
                proxy_pass  http://localhost:8000;
            }

            location ~ ^/(datastore/file/add|datastore/file/add-interactive) {
                keepalive_timeout           10m;
                client_body_timeout         10m;
                send_timeout                10m;
                proxy_read_timeout          10m;
                client_max_body_size        0M;
                proxy_request_buffering off;
                proxy_pass  http://localhost:8000;
            }
        }
        location /socket.io {
            proxy_set_header Host $http_host;
            proxy_set_header X-Real-IP $remote_addr;
            proxy_set_header X-Forwarded-For $proxy_add_x_forwarded_for;
            proxy_set_header X-Forwarded-Proto $scheme;
            proxy_http_version 1.1;
            proxy_buffering off;
            proxy_set_header Upgrade $http_upgrade;
            proxy_set_header Connection "Upgrade";
            proxy_pass http://localhost:8000/socket.io;
        }
    }
}

Setup PostgreSQL

I assume you know how to do this 🙂 You don’t need to configure a separate user, by the looks of it, IRIS likes to do that itself. Thanks to Jails I was able to run a separate PostgreSQL instance in the iris0 jail.

P.S. If you are running PostgreSQL inside a jail, make sure that the following variables are set in your jail configuration

  sysvshm         = new;
  sysvmsg         = new;

Running DFIR-IRIS

Now that everything is up and running, we just need to run DFIR-IRIS and it will create the database, needed users, an administration account, etc.

su - iris
cd ~/iris-web/source
. ../.env
~/.local/bin/gunicorn app:app --worker-class eventlet --bind 0.0.0.0:8000 --timeout 180 --worker-connections 1000 --log-level=debug

Assuming everything is fine, now we can setup a rc.d service script to make sure it runs at boot.

For that I wrote two files, the service itself and a helper start.sh script

rc.d script at /usr/local/etc/rc.d/iris

#!/bin/sh

# PROVIDE: iris
# REQUIRE: NETWORKING
# KEYWORD: 

. /etc/rc.subr

name="iris"
rcvar="iris_enable"
load_rc_config ${name}

: ${iris_enable:=no}
: ${iris_path:="/usr/local/iris"}
: ${iris_gunicorn:="/usr/local/bin/gunicorn"}
: ${iris_env="iris_gunicorn=${iris_gunicorn}"}

logfile="${iris_path}/iris.log"
pidfile="/var/run/${name}/iris.pid"

iris_user="iris"
iris_chdir="${iris_path}/source"
iris_command="${iris_path}/start.sh"

command="/usr/sbin/daemon"
command_args="-P ${pidfile} -T ${name} -o ${logfile} ${iris_command}"

run_rc_command "$1"

and the helper script at /home/iris/iris-web/start.sh

#!/bin/sh

export HOME=$(getent passwd `whoami` | cut -d : -f 6)

. ../.env

${iris_gunicorn} app:app --worker-class eventlet --bind 0.0.0.0:8000 --timeout 180 --worker-connections 128

now we set some variables in rc.conf using sysrc and we can start the service.

sysrc iris_enable="YES"
sysrc iris_path="/home/iris/iris-web"
sysrc iris_gunicorn="/home/iris/.local/bin/gunicorn"

Finally, we can start DFIR-IRIS as a service.

service iris start

Aaaaand we’re done 🙂

Thank you for reading!

There are some issues that I’d like to tackle, for example, service iris stop doesn’t work, and it would be nice if we ported all of the dependencies into Ports, but for now, this seems to be working fine.

Special thanks to the DFIR-IRIS team for creating this cool platform!

That’s all folks…

Reply via email.

Mirroring OmniOS: The Complete Guide; Part One

Chapter Ⅰ

I know that “Complete Guide” and “Part One” are oxymorons, but hey, be happy that I’m publishing in parts, otherwise I’d completely ignore this blog post.

Two weeks ago I decided to play with illumos again. I was speaking with a friend and we were sharing our frustrations regarding Open-Source contribution. We write the code, we submit, we get feedback, we submit again, and then we’re ghosted. It’s like the LinkedIn or Tinder version of Software Engineering.

Then I asked him about his best open-source experience and he told me “illumos of course!”.

I was amazed. I thought you had to be very technical in order to even build illumos, but turns out they have an amazing documentation on building illumos and OmniOS (an illumos distribution) has done work to make sure that the system can be self-hosted (i.e. The OS can build itself).

So, I decided to fire up OmniOS on our hackerspace server running FreeBSD inside a bhyve VM.

The installation went smoothly, but the IPS packages were slow to download, and I might be wrong (please correct me if I am) but IPS doesn’t seem to be keeping a local copy of the files. It always downloads. Is that configurable?

Regardless. I thought that the best way to contribute is to advocate. In order to do that I needed to make sure that IPS servers are fast in Armenia. Hence the mirroring project started.

Obey!

Requirements

Here are some terminology that I will use in this blog post, just so we are on the same page.

  • OmniOS: an illumos distribution
  • Origin: OmniOS’s IPS servers at pkg.omnios.org
  • Local: A copy of the Origin
  • Repository: A collection of software
  • Core: The Core Repository of OmniOS
  • Extras: The Extra Repository of OmniOS
  • IPS or PKG: The Image Packaging System and its utility, pkg
  • Zone: an illumos Zone (similar to FreeBSD Jails, Linux Containers, chroot) running on OmniOS

Now that we are on the same page, let’s talk about our setup and what we need.

  • An internet connection: duh!
  • A domain name: I decided to use pkg.omnios.illumos.am. Yes, I’m lucky like that.
  • A publicly accessible IP address.
  • A server: I am running OmniOS Stable (r151048) inside a VM. You can use bare-metal or a cloud VM if you want.
  • Storage: I am currently using around 50GB of storage, expect that to go around 300GB when we get to Part Three

Pre-Mirroring Setup

Before we setup our mirror, let’s make sure that we have a good infrastructure that we can maintain.

Here’s what we’ll create

  • A Zone that will act as the HTTP(s) server using nginx at IP address 10.10.0.80
  • A Zone that will do the mirroring using IPS tools at 10.10.0.51
  • An virtual dumb switch (etherstub) that will connect the Zones and the Global-Zone (a.k.a The Host) together. The GZ will have an address of 10.10.0.1
  • ZFS datasets for each Core and Extras Repository (for each release)

Please note that there are many ways to do this, for example, having everything in a Global Zone, running IPS mirroring and nginx in a single Zone, not using etherstub at all, etc. But I like this setup as it will allow us to “grow” in the future.

From now on, omnios# means that we’re in the Global Zone and zone0# means we’re inside a Zone named zone0.

Let’s start with setting up our etherstub and connecting our Global Zone to it

omnios# dladm create-etherstub switch0
omnios# dladm create-vnic -l switch0 vnic0
omnios# ipadm create-if vnic0
omnios# ipadm create-addr -T static -a 10.10.0.1/24 vnic0/switch0

Done!

Now, we will setup our Zones using the zadm utility. Install zadm by running

omnios# pkg install zadm

After installing zadm, we’ll create a dataset for our Zones

omnios# zfs create -o mountpoint=/zones rpool/zones

This assumes that your ZFS pool is named rpool.

Finally, we can create our Zones. Running

omnios# zadm create -b pkgsrc www0

will open your $EDITOR, where you need to modify some JSON, here’s what mine looks like!

{
   "autoboot" : "true",
   "brand" : "pkgsrc",
   "ip-type" : "exclusive",
"dns-domain" : "omnios.illumos.am", "net" : [ { "allowed-address" : "10.10.0.80/24", "defrouter" : "10.10.0.1", "global-nic" : "switch0", "physical" : "www0" } ], "pool" : "", "scheduling-class" : "", "zonename" : "www0", "zonepath" : "/zones/www0" }

After saving the file, zadm will install the Zone.

Now let’s setup our mirroring Zone. Do the same but change the Zone name to repo, the brand to lipkg (and -b lipkg) and set the IP address to 10.10.0.51/24.

All we need now is to forward the HTTP/HTTPS traffic to www0 Zone and allow all Zones to access the internet using NAT.

Create and edit the IPFilter’s NAT file at /etc/ipf/ipnat.conf, here’s an example configuration

map vioif0 10.10.0.0/24 -> 212.34.250.10

rdr vioif0 212.34.250.10/32 port 80 -> 10.10.0.80 port 80 tcp
rdr vioif0 212.34.250.10/32 port 443 -> 10.10.0.80 port 443 tcp

Make sure you set the correct interface name and the correct external IP address.

Finally, we can boot our Zones!

omnios# zadm boot www0
omnios# zadm boot repo

You should see the following output when you run zadm again

omnios# zadm
NAME              STATUS     BRAND       RAM    CPUS  SHARES
global            running    ipkg        56G      12       1
repo              running    lipkg         -       -       1
www0              running    pkgsrc        -       -       1

Great! Let’s setup the mirroring process.

Mirroring Setup

Let’s create a ZFS dataset for repos for each release

repo# zfs create -o mountpoint=/repo rpool/zones/repo/ROOT/repo      
repo# zfs create rpool/zones/repo/ROOT/repo/r151048      
repo# zfs create rpool/zones/repo/ROOT/repo/r151048/core 
repo# zfs create rpool/zones/repo/ROOT/repo/r151048/extra

And then we use the pkgrepo command to create a repository

repo# pkgrepo create /repo/r151048/core
repo# pkgrepo create /repo/r151048/extra

And finally, we can start receiving the packages from Origin to Local

repo# pkgrecv -s https://pkg.omnios.org/r151048/core/  -d /repo/r151048/core  '*'
repo# pkgrecv -s https://pkg.omnios.org/r151048/extra/ -d /repo/r151048/extra '*'

This will take a while depending on your internet connection speed and the load on OmniOS’s Origin. It’s like a good investment, we spend load and time now so we save traffic and time later 🙂

After it’s done, we need to set the publisher of these repos the same as Origin.

repo# pkgrepo set -s /repo/r151048/core   publisher/prefix=omnios
repo# pkgrepo set -s /repo/r151048/extra/ publisher/prefix=extra.omnios

And we’re done!

Now need to serve these repos using IPS’s depot server.

We will create two instances of the depotd server, one for core and one for extra.

  • r151048/core will run on 5148
  • r151048/extra will run on 1148
  • (in the future) r151050/core will run on 5150
  • (in the future) r151050/extra will run on 1150

We start with core

repo# svccfg -s pkg/server add r151048_core
repo# svccfg -s pkg/server:r151048_core addpg pkg application
repo# svccfg -s pkg/server:r151048_core setprop pkg/inst_root = /repo/r151048/core/
repo# svccfg -s pkg/server:r151048_core setprop pkg/port = 5148
repo# svccfg -s pkg/server:r151048_core setprop pkg/proxy_base = https://pkg.omnios.illumos.am/r151048/core

And we do the same for extra

repo# svccfg -s pkg/server add r151048_extra
repo# svccfg -s pkg/server:r151048_extra addpg pkg application
repo# svccfg -s pkg/server:r151048_extra setprop pkg/inst_root = /repo/r151048/extra/
repo# svccfg -s pkg/server:r151048_extra setprop pkg/port = 1148
repo# svccfg -s pkg/server:r151048_extra setprop pkg/proxy_base = https://pkg.omnios.illumos.am/r151048/extra

Finally, we enable the services

repo# svcadm enable  pkg/server:r151048_core pkg/server:r151048_extra
repo# svcadm restart pkg/server:r151048_core pkg/server:r151048_extra

Let’s check!

We’re good! Now let’s setup Nginx 🙂

The Web Server

This part is pretty easy, we login into www0, install nginx, and setup some paths. I will be posting a copy-pasta of my configs, I assume you can do the rest 🙂

www0# pkgin update
www0# pkgin install nginx

Thank you SmartOS! 🧡

In my nginx.conf, I added

include vhosts/*.conf;

and then in /opt/local/etc/nginx/vhosts I created a file
named pkg.omnios.illumos.am.conf, which looks like this

server {
        listen 80;
        server_name pkg.omnios.illumos.am;

        location /.well-known/acme-challenge/ {
          alias /opt/local/www/acme/.well-known/acme-challenge/;
        }

        location / {
            return 301 "https://pkg.omnios.illumos.am";
        }
}

server {
    listen       443 ssl;
    server_name  pkg.omnios.illumos.am;

    ssl_certificate      /etc/ssl/pkg.omnios.illumos.am/fullchain.pem;
    ssl_certificate_key  /etc/ssl/pkg.omnios.illumos.am/key.pem;
    location /r151048/core/ {
                proxy_pass http://10.10.0.51:5148/;
    }

    location /r151048/extra/ {
                proxy_pass http://10.10.0.51:1148/;
    }

    location / {
# This needs to be changed, later... add_header Content-Type text/plain; return 200 "ok..."; } }

Finally, we just need to enable nginx

www0# svcadm enable pkgsrc/nginx

and check!

Using the Local Repos

This part is actually pretty easy. We just need to remove everything that exists and add our own. I will be running this on a computer named dna0.

dna0# pkg set-publisher -M '*' -G '*' omnios
dna0# pkg set-publisher -M '*' -G '*' extra.omnios
dna0# pkg set-publisher -O https://pkg.omnios.illumos.am/r151048/core omnios
dna0# pkg set-publisher -O https://pkg.omnios.illumos.am/r151048/extra extra.omnios
dna0# pkg publisher PUBLISHER TYPE STATUS P LOCATION extra.omnios origin online F https://pkg.omnios.illumos.am/r151048/extra/ omnios origin online F https://pkg.omnios.illumos.am/r151048/core/

We’re good! 🙂

Fetching Updates

By the time I wanted to publish this I noticed that there’s a new OmniOS Weekly Update, so I thought, hey, maybe I should try updating the Local Repo as well… how do we do that?

Turns out I just need to pkgrecv again, and then run a refresh command.

pkgrecv -v -s https://pkg.omnios.org/r151048/core/ -d /repo/r151048/core/ '*'
pkgrepo -s /repo/r151048/core refresh

And looks like we’re good! Maybe we can setup a simple cronjob 🙂

Final Notes

This has been an amazing experience. Since I started using OmniOS two weeks ago, I’ve setup the mirror, I installed two OmniOS deployments on production for two organization, and I talked about it during our Armenian Hackers Radio Podcast. With this mirror completely setup, I can advocate even more!

I’d like to send my thanks (and later, my money) to the OmniOS team for the amazing work they’re doing, special thanks to andyf for answering all of my questions, neirac for pushing me to try more illumos in my life and everyone who contributed to the docs and blog posts that I used. I’ll leave some links below.

Finally, for the coming (two) posts I will talk about mirroring downloads.OmniOS.org (for ISO/USB/ZFS images) and the pkgsrc repository run by SmartOS/MNX.

Thank you for reading and thank you, illumos-community for being so nice ^_^

That’s all folks…

Links

Reply via email.

FreeBSD arm64.aarch64 on QEMU/UTM with better (but not perfect) graphics

A week ago I posted about Running arm64.aarch64 FreeBSD on QEMU/UTM.app on Apple Silicon, and looks like

  1. Many people liked that post
  2. Everyone asked about running graphics (Xorg)

It took me a while but in the end it was, again, a simple change.

All you have to do is to add this single line to /boot/loader.conf

efi_max_resolution="1920x1080"

Now, QEMU’s display will not be 1080p, but it will be the following

VT(efifb): resolution 1024x768

Here are some screenshots

Here’s also Firefox doing an HTML5 test. As you can see, it passed the exam!

However, I’d like to get more resolution out of this. If you know how, please let me know.

That’s all folks…

Reply via email.

Running arm64.aarch64 FreeBSD on QEMU/UTM.app on Apple Silicon

Around a year ago I got an M1 MacBook Air for work. At this point, a lot of people that I know use these Apple Silicon machines.

While my personal machine is running FreeBSD, many times I’ve been in a situation where I need to run FreeBSD on my M1 MacBook Air, at least as a Virtual Machine.

For 9 months I’ve been running the AMD64 version of FreeBSD on QEMU/UTM.app using emulation. It gets the job done.

But whenever I want to do FreeBSD development, I need a fast machine. While M1 is pretty fast, VM emulation is still slow.

The problem is that whenever I booted the arm64.aarch64 FreeBSD on QEMU, it would use so much CPU on the host, that my battery would die in an hour or so.

After a lot of searching, I finally found this, this and this, which eventually got me to this page on the handbook

1. Set Boot Loader Variables
The most important step is to reduce the kern.hz tunable to reduce the CPU utilization of FreeBSD under the Parallels environment. This is accomplished by adding the following line to /boot/loader.conf:

kern.hz=100

Without this setting, an idle FreeBSD Parallels guest will use roughly 15% of the CPU of a single processor iMac®. After this change the usage will be closer to 5%.

Configuring FreeBSD on Parallels

So I tried that, and here you go!

Ahh, finally, I can do some work.

That’s all folks…

Reply via email.

Meta-programming in Shell

Wikipedia defines meta-programming as:

programming technique in which computer programs have the ability to treat other programs as their data. It means that a program can be designed to read, generate, analyze or transform other programs, and even modify itself while running

Uncle Wiki

I had to write a “framework” at work where a shell program would run other shell programs “dynamically”. Let’s dig in!

As I mentioned in my earlier post Two Colons Equals Modules, you can “emulate” modules and functions in Shell (at least in FreeBSD’s /bin/sh) by using ::, so it would be module::function

Here we will do the same, however we will do hook::module.

The goal is to have a Shell program that would take a pid as an argument and do something with that PID, say print a group of information, maybe use DTrace to trace it, etc.

Let’s start by writing our main program.

#!/bin/sh
set -m

usage()
{
  echo "${0##*/} pid"
}

# print usage if argc < 1
[ "${#}" -lt "1" ] && usage && exit 1

# load scripts
load_scripts()
{
  for ctl in ./*.ctl.sh;
  do
    . "${ctl}"
  done
}

# stop the runner by killing the PIDs
runner_stop()
{
  IFS=":"
  for pid in $1;
  do
    kill $pid
  done
  exit
}

# Stop the runner if user sends an input
# This is useful if the runner is executed via a controller
wait_input()
{
  read command
  runner_stop ${PIDS}
}

# a.k.a. main()
runner_start()
{
  # make sure the process exists
  _pid="$1"
  ps -p "${_pid}" 1>/dev/null
  [ $? != 0 ] && exit 2

  # initiate scripts
  load_scripts

  # change IFS to :
  # loop over $SCRIPTS and execute the add hook
  IFS=":"
  for ctl in ${SCRIPTS};
  do
    add::${ctl} "${_pid}"
  done

  # now that we know the commands, loop over them too!
  # inside the loop set IFS to "," to set args
  for cmd in ${COMMAND};
  do
    IFS=","
    set -- "${cmd}"
    run::$1 $2
  done

  # Add trap for signals
  trap "runner_stop ${PIDS}" EXIT SIGINT SIGPIPE SIGHUP 0
  # reset IFS
  unset IFS
  wait_input
}

RUNNERDIR=$(dirname "$0")
(cd $RUNNERDIR && runner_start "$1")

Let’s digest a bit of that. First, we check if the number of arguments provided is less than 1

[ "${#}" -lt "1" ] && usage && exit 1

then we call usage and we exit with return code 1

The load_scripts function will load a bunch of scripts (from the same directory) as long as the scripts are suffixed .ctl.sh

Here’s an example script, say fds.ctl.sh, which will print File Descriptors used by the process, we will use procstat internally.

#!/bin/sh

add::fds()
{
  COMMAND="fds,$1:$COMMAND"
}

run::fds()
{
  procstat --libxo=xml -w 5 -f "$1" &
  PIDS="$!:$PIDS"
}

export SCRIPTS="fds:$SCRIPTS"

Here’s where meta-programming comes into use (I think), we have a variable named $SCRIPTS, which is modified to add the script name into it, $PATH-style, and two functions, add::fds and run::fds. As you have guessed add:: and run:: are the hook names.

I’ll add another script, it will use procstat as well, but this time we will print the resource usage

#!/bin/sh

add::resource()
{
  COMMAND="resource,$1:$COMMAND"
}

run::resource()
{
  procstat --libxo=xml -w 5 -r "$1" &
  PIDS="$!:$PIDS"
}

export SCRIPTS="resource:$SCRIPTS"

The same applies here, one variable, $SCRIPTS and two functions, add::resource and run::resource.

Which means, after loading our scripts all four functions will be loaded into our program and the environment variable $SCRIPTS will have the value resource:fds:

Good? Okay let’s continue.

Since we used : to separate the name of the scripts we must set IFS to :, and we start looping over $SCRIPTS. Now we just run add::${ctl}, which would be add::fds and add::resource. We also pass the ${_pid} variable, if we need to

These two functions would do more meta-programming by setting the $COMMAND variable to script_name,arguments:$COMMAND, again PATH-style.

Which means that the $COMMAND variable has the value fds,89913:resource,89913:

The next bit is a bit tricky, since we’ve set $COMMAND to prog0,arg1:prog1,arg1,arg2: (well, not really arg2, but we could’ve) then we need to

  1. Use “,” as IFS
  2. Tell sh to set the positional parameters, so prog0 becomes $1 and arg1 becomes $2, etc.

and now we execute run::$1 $2, which would be run::fds 89913 then run::resource 89913.

I think I can make this better by running run::$@, where $@ is basically all the parameters, but will test that later

– antranigv at 6am reading the code that he wrote drunk

In the end, we add some signal trapping, we reset IFS and we just wait for an input.

Okay, so we now have a piece of software that reads other programs and modifies itself while running. We have a meta-program!

Let’s give it a run.

# ./runner.sh 89913
<procstat version="1"><files><89913><procstat version="1"><rusage><89913><process_id>89913</process_id><command>miniflux</command><user time>01:37:54.339245</user time><system time>00:19:43.630210</system time><maximum RSS>61236</maximum RSS><integral shared memory>5917491656</integral shared memory><integral unshared data>1310633336</integral unshared data><integral unshared stack>114278656</integral unshared stack><process_id>89913</process_id><command>miniflux</command><files><fd>text</fd><fd_type>vnode</fd_type><vode_type>regular</vode_type><fd_flags>read</fd_flags><ref_count>-</ref_count><offset>-</offset><protocol>-</protocol><path>/usr/local/jails/rss/usr/local/bin/miniflux</path><page reclaims>16939</page reclaims><page faults>7</page faults><swaps>0</swaps><block reads>5</block reads><block writes>1</block writes><messages sent>12603917</messages sent></files><files><fd>cwd</fd><fd_type>vnode</fd_type><vode_type>directory</vode_type><fd_flags>read</fd_flags><ref_count>-</ref_count><offset>-</offset><protocol>-</protocol><path>/usr/local/jails/rss/root</path><messages received>14057863</messages received><signals received>807163</signals received><voluntary context switches>79530890</voluntary context switches><involuntary context switches>5489854</involuntary context switches></files><files><fd>root</fd><fd_type>vnode</fd_type><vode_type>directory</vode_type><fd_flags>read</fd_flags><ref_count>-</ref_count><offset>-</offset><protocol>-</protocol><path>/usr/local/jails/rss</path></89913></rusage></procstat></files><files><fd>jail</fd><fd_type>vnode</fd_type><vode_type>directory</vode_type><fd_flags>read</fd_flags><ref_count>-</ref_count><offset>-</offset><protocol>-</protocol><path>/usr/local/jails/rss</path></files><files><fd>0</fd><fd_type>vnode</fd_type><vode_type>character</vode_type><fd_flags>read</fd_flags><fd_flags>write</fd_flags><ref_count>4</ref_count><offset>0</offset><protocol>-</protocol><path>/usr/local/jails/rss/dev/null</path></files><files><fd>1</fd><fd_type>pipe</fd_type><fd_flags>read</fd_flags><fd_flags>write</fd_flags><ref_count>2</ref_count><offset>0</offset><protocol>-</protocol><path>-</path></files><files><fd>2</fd><fd_type>pipe</fd_type><fd_flags>read</fd_flags><fd_flags>write</fd_flags><ref_count>2</ref_count><offset>0</offset><protocol>-</protocol><path>-</path></files><files><fd>3</fd><fd_type>kqueue</fd_type><fd_flags>read</fd_flags><fd_flags>write</fd_flags><ref_count>2</ref_count><offset>0</offset><protocol>-</protocol><path>-</path></files><files><fd>4</fd><fd_type>pipe</fd_type><fd_flags>read</fd_flags><fd_flags>write</fd_flags><fd_flags>nonblocking</fd_flags><ref_count>2</ref_count><offset>0</offset><protocol>-</protocol><path>-</path></files><files><fd>5</fd><fd_type>pipe</fd_type><fd_flags>read</fd_flags><fd_flags>write</fd_flags><fd_flags>nonblocking</fd_flags><ref_count>1</ref_count><offset>0</offset><protocol>-</protocol><path>-</path></files><files><fd>6</fd><fd_type>socket</fd_type><fd_flags>read</fd_flags><fd_flags>write</fd_flags><fd_flags>nonblocking</fd_flags><ref_count>3</ref_count><offset>0</offset><protocol>TCP</protocol><sendq>0</sendq><recvq>0</recvq><path>192.168.10.5:63835 192.168.10.3:5432</path></files><files><fd>7</fd><fd_type>socket</fd_type><fd_flags>read</fd_flags><fd_flags>write</fd_flags><fd_flags>nonblocking</fd_flags><ref_count>3</ref_count><offset>0</offset><protocol>TCP</protocol><sendq>0</sendq><recvq>0</recvq><path>::.8080 ::.0</path></files></89913></files></procstat>

Why XML? Because libxos JSON output is not “real” JSON when procstat‘s running in repeat mode, but that’s a story for another day.

All code examples can be found as a GitHub Gist.

That’s all folks…

Reply via email.

Huginn on FreeBSD

Huginn is probably the best automation software that I’ve ever seen. It’s not only easy to use, but also easy to deploy and easy to extend. Unfortunately there’s no FreeBSD port for it, but looks like it’s something wanted by the community, at least according to WantedPorts.

I realized that I have at least 5 accounts on IFTTT, which is also an amazing automation service. However, 3/5 of these accounts were not “my own”. It belonged to our communities. You know, Meetups in Armenia and news listing websites similar to Lobste.rs. So if I get hit by a bus, it will be very hard for our community to operate these accounts, that’s why I wanted to deploy Huginn.

Like a sane person, I deploy in FreeBSD Jails (I recommend you do too!). Which meant there’s no official (or maybe even unofficial?) docs on how to deploy Huginn on FreeBSD.

It’s written in Ruby, which means it should work and should be very easy to ports. I’ll go over the deployment needs without the actual deployment, setup of Jails, or anything similar. Let’s go!

First thing first, you need Ruby thingies:

  • ruby
  • rubygem-bundler
  • rubygem-mimemagic
  • rubygem-rake
  • rubygem-mysql2

Here’s the full command for copy/paster:

pkg instal ruby rubygem-bundler rubygem-mimemagic rubygem-rake rubygem-mysql2

Next, you’ll need gmake for makefiles and node for assets:

pkg install gmake node

This should be enough. I’m also going to install git-tiny so I can follow their updates with ease.

pkg install git-tiny

Okay, let’s make a separate user for Huginn.

pw user add huginn -s /bin/tcsh -m -d /usr/local/huginn

Let’s switch our user

su - huginn

Okay, now I’m going to clone the repo 🙂

git clone --depth=1 https://github.com/huginn/huginn/

At this point you can go do installation.md#4-databases and configure your database.

You should also do cp .env.example .env and configure the environment, make sure to set RAILS_ENV=production

Next, as root, you should execute the following

cd /usr/local/huginn/huginn/ && bundle install

You might get an error saying

In Gemfile:
  mini_racer was resolved to 0.2.9, which depends on
    libv8

Don’t panic! That’s fine, unfortunately it’s trying to compile libv8 using Gems. Even if we installed the patched version of v8 using pkg, it still doesn’t work. I’ll try to workaround that later.
I an ideal world, all of these Ruby Gems should be ported to FreeBSD, I’m not sure which are ported, so I’ll just be using the bundle command to install them. And that’s why we use Jails 🙂

Anyways, the dependency Gem is mini_racer, comment its line in Gemfile

#gem 'mini_racer', '~> 0.2.4'      # JavaScriptAgent

Now let’s run Bundle again

cd /usr/local/huginn/huginn/ && bundle install

Okay! everything is good!

Let’s also build the assets, this one should be run as the user huginn

bundle exec rake assets:precompile RAILS_ENV=production

NOTE: If you get the following error ExecJS::RuntimeError: ld-elf.so.1: /lib/libcrypto.so.111: version OPENSSL_1_1_1e required by /usr/local/bin/node not found then you need to upgrade your FreeBSD version to the latest patch!

Aaand that’s it, everything is ready.

For the rest of the deployment process, such as the database, nginx, etc., please refer to installation.md

Currently, I’m running Huginn in a tmux session running bundle exec foreman start, but in the future, I’ll write an rc.d script and share it with you, too.

That’s all folks.

Reply via email.

WireGuard “dynamic” routing on FreeBSD

I originally wrote about this on my Armenian blog when ISPs started blocking DNS queries during and after the war. I was forces to use either 9.9.9.9, 1.1.1.1, 8.8.8.8 or any other major DNS resolver. For me this was a pain because I was not able to dig +trace, and I dig +trace a lot.

After some digging (as mentioned in the Armenian blog) I was able to figure out that this affects only the home users. Luckily, I also run servers at my home and the ISPs were not blocking anything on those “server” ranges, so I setup WireGuard.

This post is not about setting up WireGuard, there are plenty of posts and articles on the internet about that.

Over time my network became larger. I also started having servers outside of my network. One of the fast (and probably wrong) ways of restricting access to my servers was allowing traffic only from my own network.

I have a server that acts as WireGuard VPN Peer and does NAT-ing. That being said, the easiest way for me to start accessing my restricted servers is by doing route add restricted_server_addr -interface wg0.

Turns out I needed to write some code for that, which I love to do!

Anytime that I need to setup a WireGuard VPN client I go back to my Armenian post and read there, so now I’ll be blogging how to do dynamic routing with WireGuard so I read whenever I need to. I hope it becomes handy for you too!

Now, let’s assume you need to add a.b.c.d in your routes, usually you’d do route add a.b.c.d -interface wg0, but this would not work, since in your WireGuard configuration you have a line that says

[Peer]
AllowedIPs = w.x.y.z/24

Which means, even if you add the route, the WireGuard application/kernel module will not route those packets.

To achieve “dynamic” routing we could do

[Peer]
AllowedIPs = 0.0.0.0/0

This, however will route ALL your traffic via WireGuard, which is also something you don’t want, you want to add routes at runtime.

What we could do, however, is to ask WireGuard to NOT add the routes automatically. Here’s how.

[Interface]
PrivateKey      = your_private_key
Address         = w.x.y.z/32
Table           = off
PostUp          = /usr/local/etc/wireguard/add_routes.sh %i
DNS             = w.z.y.1

[Peer]
PublicKey       = their_public_key
PresharedKey    = pre_shared_key
AllowedIPs      = 0.0.0.0/0
Endpoint        = your_server_addr:wg_port

The two key points here are Table = off which asks WireGuard to not add the routes automatically and PostUp = /usr/local/etc/wireguard/add_routes.sh %i which is a script that does add the routes, where %i is expanded to the WireGuard interface name; could be wg0, could be home0, depends in your configuration.

Now for add_routes.sh we write the following.

#!/bin/sh

interface=${1}

networks="""
w.x.y.0/24
restricted_server_addr/32
another_server/32
"""

for _n in ${networks};
do
  route -q -n add ${_n} -interface ${interface}
done

And we can finally do wg-quick up server0.conf

If you need to add another route while WireGuard is running, you can do

route add another_restricted_server -interface wg0

Okay, what if you need to route everything while WireGuard is running? Well, that’s easy too!

First, find your default gateway.

% route -n get default | grep gateway
    gateway: your_gateway

Next, add a route for your endpoint via your current default gateway.

route add you_server_addr your_gateway

Next, add TWO routes for WireGuard.

route add 0.0.0.0/1     -interface wg0
route add 128.0.0.0/1   -interface wg0

So it’s the two halves of the Internet 🙂

That’s all folks!

Reply via email.

VoidLinux in FreeBSD Jail; with init

Two important things happened this week for me.

First, Faraz asked me if I can rename my Jail manager to something other than Jailio because he got that domain for his Jailer manager already. So I named it

Second, I was able to run a complete Linux system using Jailer. While the repo for Jailer is not released yet (we are auditing for possible security issues), I would like to share how I was able to run VoidLinux in a Jail.

Since Jailer is not announced yet, I will give the examples using jail.conf, as most people either are or should be familiar with its concepts.

I went with VoidLinux because I am able to run the init process without its need to be running as PID1.

Let’s start, shall we?

First, ZFS dataset for our jail!

zfs create zroot/jails/voidlinux

Next we need to fetch the base system of VoidLinux. Luckily they do provide it on their website.

fetch https://alpha.de.repo.voidlinux.org/live/current/void-x86_64-ROOTFS-20210218.tar.xz

Now we can extract this into our dataset

tar xf void-x86_64-ROOTFS-20210218.tar.xz -C /usr/local/jails/voidlinux/

You might get an error that ./usr/bin/iputils-ping: Cannot restore extended attributes: security.capability, which is fine, I think?

If you are on FreeBSD 12.2-RELEASE or later, now you need to enable the Linuxulator.

service linux enable; service linux start

Now you can at least chroot into the system.

chroot /usr/local/jails/voidlinux/ /bin/bash

If everything is fine until now, perfect.

Now we need to add a root user into the system.

root@host:~ # cd /usr/local/jails/voidlinux/etc/
root@host:/usr/local/jails/voidlinux/etc # echo "root::0:0::0:0:Charlie &:/root:/bin/bash" > master.passwd
root@host:/usr/local/jails/voidlinux/etc # pwd_mkdb -d ./ -p master.passwd
pwd_mkdb: warning, unknown root shell

Execute the rest of the commands in Void.

root@host:~ # chroot /usr/local/jails/voidlinux/ /bin/bash
bash-5.1# cd /etc/
bash-5.1# pwconv 
bash-5.1# grpconv 
bash-5.1# passwd 
New password: 
Retype new password: 
passwd: password updated successfully
bash-5.1# exit

If all went fine, then the system is ready to be run as a Jail!

First we need to make an fstab for the system.

Create a file at /usr/local/jails/voidlinux/etc/fstab.pre and insert the following inside

devfs       /usr/local/jails/voidlinux/dev      devfs           rw                      0   0
tmpfs       /usr/local/jails/voidlinux/dev/shm  tmpfs           rw,size=1g,mode=1777    0   0
fdescfs     /usr/local/jails/voidlinux/dev/fd   fdescfs         rw,linrdlnk             0   0
linprocfs   /usr/local/jails/voidlinux/proc     linprocfs       rw                      0   0
linsysfs    /usr/local/jails/voidlinux/sys      linsysfs        rw                      0   0
/tmp        /usr/local/jails/voidlinux/tmp      nullfs          rw                      0   0

Next, let’s create a loopback interface for networking. Oh yes, VNET is not supported yet, but I’m working on a patch 🙂

ifconfig lo1 create
ifconfig lo1 inet 10.10.0.1/24 up # sorry, 10.0.0.0/24 was unavailable :P

Okay, time to create our Jail conf!

exec.clean;
allow.raw_sockets;
mount.devfs;

voidlinux {
    $id     = "1";
    $ipaddr = "10.10.0.42";
    $mask   = "255.255.255.0";
    $domain = "srv0.bsd.am";
    devfs_ruleset  = 4;
    allow.mount;
    allow.mount.devfs;
    mount.fstab = "${path}/etc/fstab.pre";

    exec.start     = "/bin/sh /etc/runit/2 &";
    exec.stop      = "/bin/sh /etc/runit/3";


    ip4.addr      = "${ipaddr}";
    interface     = "lo1";
    host.hostname = "${name}.${domain}";
    path = "/usr/local/jails/voidlinux";
    exec.consolelog = "/var/log/jail-${name}.log";
    persist;
    allow.socket_af;
}

Let’s check?

# jls
   JID  IP Address      Hostname                      Path
     1  192.168.0.42    voidlinux.srv0.bsd.am         /usr/local/jails/voidlinux

And the process tree?

# ps auxd -J voidlinux
USER   PID %CPU %MEM  VSZ  RSS TT  STAT STARTED    TIME COMMAND
root 35182  0.0  0.1 2320 1428  -  SsJ  21:09   0:00.12 runsvdir -P /run/runit/runsvdir/current log: ot set SO_PASSCRED: Protocol not available\ncould not set SO_PASSCRED: Protocol
root 35190  0.0  0.1 2168 1376  -  SsJ  21:09   0:00.02 - runsv agetty-tty6
root 35397  0.0  0.1 2412 1704  -  SsJ  21:10   0:00.00 `-- agetty tty6 38400 linux
root 35191  0.0  0.1 2168 1376  -  SsJ  21:09   0:00.02 - runsv agetty-tty1
root 35396  0.0  0.1 2412 1704  -  SsJ  21:10   0:00.00 `-- agetty --noclear tty1 38400 linux
root 35192  0.0  0.1 2168 1376  -  SsJ  21:09   0:00.02 - runsv agetty-tty5
root 35398  0.0  0.1 2412 1704  -  SsJ  21:10   0:00.01 `-- agetty tty5 38400 linux
root 35193  0.0  0.1 2168 1376  -  SsJ  21:09   0:00.02 - runsv agetty-tty2
root 35393  0.0  0.1 2412 1704  -  SsJ  21:10   0:00.00 `-- agetty tty2 38400 linux
root 35194  0.0  0.1 2168 1396  -  RsJ  21:09   0:00.12 - runsv udevd
root 35195  0.0  0.1 2168 1376  -  SsJ  21:09   0:00.02 - runsv agetty-tty3
root 35394  0.0  0.1 2412 1704  -  SsJ  21:10   0:00.00 `-- agetty tty3 38400 linux
root 35196  0.0  0.1 2168 1376  -  SsJ  21:09   0:00.02 - runsv agetty-tty4
root 35390  0.0  0.1 2412 1704  -  SsJ  21:10   0:00.00 `-- agetty tty4 38400 linux

You may jexec now 🙂

# jexec voidlinux /bin/bash
bash-5.1# uname -a
Linux voidlinux.srv0.bsd.am 3.2.0 FreeBSD 12.2-RELEASE-p6 GENERIC x86_64 GNU/Linux

Let’s check networking?

bash-5.1# ping -c 1 10.10.0.1
ping: WARNING: setsockopt(ICMP_FILTER): Protocol not available
PING 10.10.0.1 (10.10.0.1) 56(84) bytes of data.
64 bytes from 10.10.0.1: icmp_seq=1 ttl=64 time=0.069 ms

--- 10.10.0.1 ping statistics ---
1 packets transmitted, 1 received, 0% packet loss, time 0ms
rtt min/avg/max/mdev = 0.069/0.069/0.069/0.000 ms

There you go! Well, things that are related to netlink might not work, but other than that it’s okay.

I did have some problems while installing packages, something about too many levels of symbolic links. Here’s the exact output when I was trying to install the curl package

[*] Unpacking packages
libev-4.33_1: unpacking ...
ERROR: libev-4.33_1: [unpack] failed to extract file `./usr/lib/libev.so.4': Too many levels of symbolic links
ERROR: libev-4.33_1: [unpack] failed to extract files: Too many levels of symbolic links
ERROR: libev-4.33_1: [unpack] failed to unpack files from archive: Too many levels of symbolic links
Transaction failed! see above for errors.

Now, I did not find the time to fix this yet, but if you have any idea, please let me know or comment below 🙂

So, what do we have here? A Linux Jail, running VoidLinux, with init, so you can also run services, and basic networking for it.

That’s all folks…

Reply via email.